Rigging & Creature FX
Week 01: Rigging Overview - Tentacle
We gained a thorough understanding of the basic workflow for generating a rig in Maya during the first session of the module. We learned how to model a basic tentacle, create a joint chain, skin mesh to joints, and add controls. Finally, we made a Mash network to place tentacle instances across the surface of a sphere and a second Mash network to generate sphere instances with tentacles.
.png)
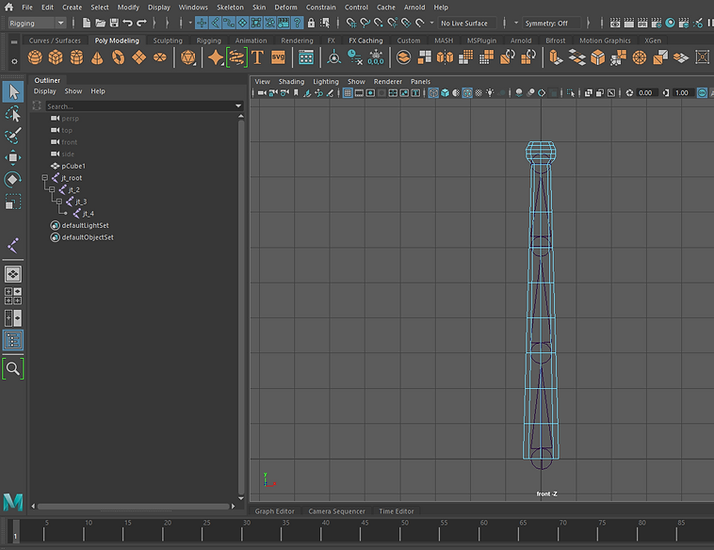
I made a simple poly cube, added subdivisions and scaled it along the Y axes. Also, I changed the position of its pivot point.
.png)
I then made a joint chain by Skeleton -> Create Joints
.png)
Used Skin -> Bind Skin to bind geometry to the rig.
.png)
I could rotate each joint to rotate different parts of geometry; however, it is best to use controllers for it.
.png)
I could play around with Radius to change the size of the joints if needed.
.png)
Created NURBS circles to act as controllers for each joint.
.png)
I applied a Parent Constraint to the first joint so that the first NURBS circle could constrain translation and rotation of the first joint. For the second and third joints, I used Orient Constraint as they just needed to be manipulated by rotation.
.png)
Parented the controllers together.
.png)
I added expressions to the 3rd and 2nd controllers to give the tentacle random movement. Used jt_02_ctrl.rotateZ = sin(time*3)*60; jt_02_ctrl.rotateX = sin(time*4)*20; for the third joint, and jt_01_ctrl.rotateZ = sin(time*4)*20; for second joint (the middle one).
.png)
Created a Mash network from the tentacle, used a platonic shape as the input mesh, used Random and Signal nodes. Note: play around with the Push Along Normal attribute if the tentacles are pushed inside the platonic.
.png)
Created a second Mash network that makes instances of the platonic with tentacles.
Preparing scene for Arnold renderer
Some of the things I did:
-
Add a aiStandardSurface Shader.
-
activate subsurface scattering
-
Add lights to bring out the subsurface scattering
-
Add aiAtmosphereVolume to scene
.png)
Added aiSkyDomeLight.
.png)
Added a camera and a SpotLight.
.png)
Smoothing by Arnold renderer
.png)
Added aiAtmosphereVolume to scene
.png)
Added a light filter to add noise.
.png)
Noise added.
.png)
Noise attributes.
Final result (Arnold render)
Week 2: Joint Creation - ROBOT
We explored joints in Maya this week. We learned two useful techniques for building up the joints and tried those techniques for a simple robot. The first method was to create joints along the X-axis on the grid and then move the joint chain to align it with the mesh in a way that does not break the orientation of the joints. Note: We can only rotate the joints and move them only in the X so as not to break them. The second method was to make two chains of joints. This technique is easier and faster, in my opinion.
First technique
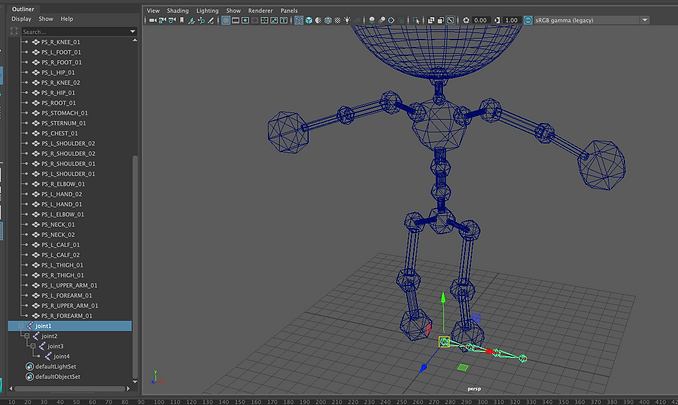
Made a joint chain along the X axis by Skeleton -> Create Joints

I moved the chain and snapped it to the shoulder. Note: go to Display -> Transform Display -> Local Rotation Axes and turn it on for the sake of precise snapping.

Rotate the joints, or move them only in the X!

I deleted the last joint, which was made just for correct joint orientation.
Second technique

With this technique, I made the joints along the left foot. I noticed it was almost a correct chain of joints and I did not need to create another chain to snap it to the first one. I used Orient Joint to correct one of the joints.

Named the joints.

Toggled on the Local Rotation Axes for the platonics shown.

Snapped the joints to the middle of platonics.

Skeleton -> Mirror Joints.

I also could change the name of joints automatically by Mirror Joints options.

To connect the joints I could use Skeleton -> Connect Joints. However, I used parenting by selecting the relevant joints and pressing P on the keyboard.

Final rig created.
Animation (screen capture)
Week 03: SKINNING - ARM
We looked at skinning in Maya this week. The process of connecting deformable objects to a skeleton is known as skinning. Geometry objects become the character's surface or skin when they are bound to skin, and their forms are affected by the skeleton's joints. As a class exercise, we worked on a given arm, firstly animated the joints, then skinned the geometry and finally painted each joint for a more precise result.

I first selected my joint chain root and geometry and headed to Skin -> Bind Skin. Then right-clicked on the arm and selected Paint Skin Weights Tool.

Above is Paint Skin Weights Tool settings.

First, select the root and while "replace" is selected and value is "1", press Flood. Then, select all the joints and lock them.

Then unlock the root and shoulder, and paint the shoulder.

Select the vertices, and choose Smooth instead of Replace. This smooths out the influences of the joints

Work on painting and smoothing the root and shoulder to smooth out the deformation of the shoulder when the arm moves.

The shoulder painted.

I used aiToon shader, a non-photorealistic material provided in combination with the contour filter.

Result.
Result (screen capture)
Week 4: Rigging Controls Robot - MKII PT 01
This week, we learned more about FK and IK handles and explored their workflows. As our class task, we made both FK and IK handles for a simple robot. In the second part of the session, we practised connecting Mocap data to our robot using Maya Human IK.
I previously explored forward and inverse kinematics and the difference between them. Click here to learn more.

FK handles

It's crucial to do Freeze Transformations for every handle before connecting them to the mesh by constraints.

For the joints with rotations only, I used the Orient constraint.

Result. In this method, I only used FK handles. Note: parent the handles together after doing constraints.
IK handles

Here I wanted to use IK handles. Skeleton > Create IK Handle

I needed to constrain a pole vector so that the joint chain does not unexpectedly flip when I manipulate the IK handle.

Pole vector constrained to a star shape.

I wanted to control the opening and closing of the claw by a wrist attribute. So I added an attribute for the wrist control.

Add Attribute options.

Important: With the Set Driven Key window, we can link objects so that one object's attributes can drive or dictate the attributes of another object. In this case, I drove Rotate Z of the claw by Claw Open attribute of wrist control.

I'm a paragraph. Click here to add your own text and edit me. It's easy.
Human IK

Used HumanIK for mocap.

Our character needs a skeleton definition. Defining a skeleton is the process of mapping out the structure of our character's skeleton so that the HumanIK can understand it.

The Motion Library is one of the world’s largest library of motion assets. The Motion Library can be accessed inside Maya as well.

Maya Content Browser is also available to us, and has a pretty useful mocap library inside it!

Result.
Dance Mocap (playblast)
Week 5: Rigging Controls Robot - MKII PT 02
Picking up where we left off, we continued to create rigging controls and handles for our robot this week.
Below are a few screen recordings showing the most important workflows we learned this week:
Video #1: Adding forward/backwards curl attribute for spine
Video #2: Controlling spine curl with a secondary control
Video #3: Creating eye controls
Creating A smiley face by MASH!
We worked with Mash to create a 3D smiley face during the last part of the session. I have already fully explored MASH! Click here to jump back to it.

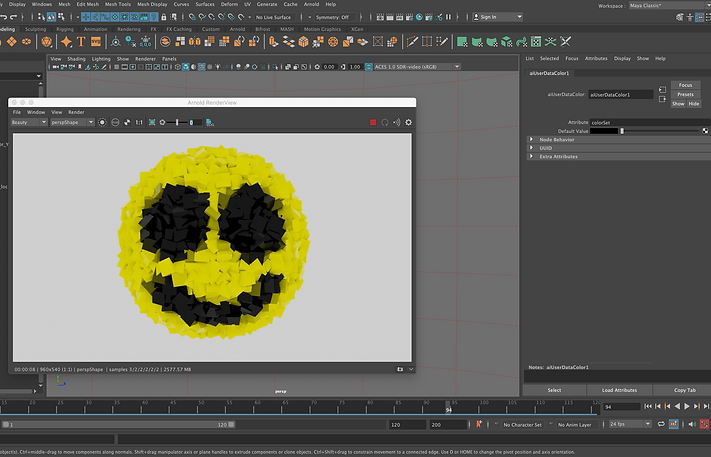

Playblast
Week 6: HYDRAULICS
This week we looked at a few techniques helping us to develop our characters. First, we looked at how to model a piston in Maya. Then, we were introduced to wire deformers. With a wire deformer, we use one or more NURBS curves to change the shape of objects and meshes.
Piston
.png)
Use Aim Constraints for both sides of the piston.
.png)
Result. Note: pivots of both sides of the piston have to be aligned when using Aim Constraint.
Wire deformer
.png)
I created a cylinder as above.
.png)
Then made a NURBS curve and used it as a wire deformed. Note: increase the dropoff distance to get your deformed working properly.
.png)
I now wanted to use a deformer for a Helix.
.png)
Converted an edge of the helix to a NURBS curve.
.png)
Note: delete history for the curve after the conversion.
.png)
Then made a NURBS curve. Then I used this curve to deform the converted curve I previously made.
Assignment 01: Mechanical Rig
For the first assignment of this module, I modelled and rigged a mechanical character using Maya. I also used Substance Painter to texture my model. I made use of a variety of rigging techniques to build up my rig and its controls.
Arnold renders


Development of my mech
Video with sound.
My rig capabilities (screen recording)
WEEK 08: TOPOLOGY
This week, we discussed topology and why it is important when creating meshes for deformation animation. The layout of our polygons across the model's surface is known as topology, so it refers to how we place and arrange our polygons.

Note 1: The amount of geometry is important. If geometry is too much, the process of UV unwrapping and skinning, as well as weight painting, will be hindered. Therefore, most of the time, we only need a small amount of geometry to have a nice and smooth animation.
Note 2: For the face, we may need more geometry in the areas where we will have deformation, like lips and eyes.
Note 3: The difference between quads and triangles is essential. Quads are generally better than triangles in terms of smoothing and deforming.
Note 4: Valence is a vertex where several edges connect to it. The valence of a vertex is the number of edges connected to that vertex. Valences are pretty crucial in modelling because they allow us to change the direction of the flow of polygons.
Note 5: We need at least 5 spans in the joints area to get the mesh bending correctly and not using volume.
Maya Quad Draw Tool
I have already fully explored Quad Draw tool. Click here to learn more.
Edge Flow Reduction
Knowing how to minimise the number of edge loops from a high mesh density to a low mesh density is an important modelling skill. Click here to learn more (Topology Guides).
WEEK 09: BLENDSHAPES
We were introduced to Blend Shapes in Maya this week. Blend shape deformers allow us to modify the shape of a mesh into the form of a target shape, for example, while animating a character's face. The Shape Editor may be used to create and manipulate all of an object's blend shape deformers, as well as to generate target shapes, adjust their weights and keys, create in-between shapes, make combination shapes, and so on.
Creating blend shapes using multiple target objects
We create target objects that are duplicates of the base object using this technique of Blend Shapes, then alter the vertex positions on each of the target objects to generate the shapes we desire. This approach may be used for face animation, for example, with each target object representing a distinct facial emotion. Below I follow this method to make a simple Blend Shape.

To create a Blend Shape deformer, go to Deform -> Blend Shape.

Select each of the deformed objects and then add the base object that we want to deform last to the selection. Note: we must select the base mesh last.

Go to Display -> Polygons -> Component IDs -> Vertices to be able to see each vertex number of our mesh. To use Blend Shape properly, we need to have exactly the same vertex numbers for each deformed meshes.

Vertices IDs.
Creating blend shapes using only the base object
We can create target shapes directly on the base object using Blend Shapes without making several target objects by duplication. This means there will be less geometry in the scene. The process is as follows:

We can change the workspace to Pose Sculpting.

I made a Blend Shape and named it "smile", then added a left smile as a target shape. For the right smile, I duplicated the target and pressed Flip Target.

Our target shapes for the left and right smiles work well on their own but don't work well when combined. We could add a Combination Target to enhance or corrects the target shapes when they're combined.

I picked Grab Tool from the Sculpting shelf to correct and adjust the mesh in my combination target.

Added a Group to have a single handle for both rights and left smiles.

We can use Pose Editor as well. The Pose Editor is where we can create pose deformations for skinned characters and save them as blend shapes.

Rotated the joints (in the rig) and pressed Add Pose.

Here I wanted to be able to use controls for deformations, instead of just joints. First and foremost, I made single-chain IK handles for the joints.

Then, I deleted the default poses as they did not work properly.

Changed the view from Default to Advanced.

Here I can introduce controllers to each driver to be able to use the controllers for deformations.

Note: I need to middle mouse drag "translate" attributes of each controller into their corresponding "Add Controllers" windows.

Translate attributes of mouth controller added.

Now I could change the mesh with the controllers and add pose.

In this stage, I added Natural Poses that I previously deleted.

As another exercise, I tried to use Blend Shapes to make an eye blink.

In-Between Target added.

Used Erase Target tool to change the mesh for the in-between shape.
WEEK 10: CRUMBLING CUBE MAN
This week we had another look at Mash networks in Maya. Using Mash, the idea was to use a character with motion capture data applied to it and fill it with cubes with different looks and approaches. I have already fully explored Mash in detail. To find out more, click here.
I played around with Mash again this week, below are some of the results I got.
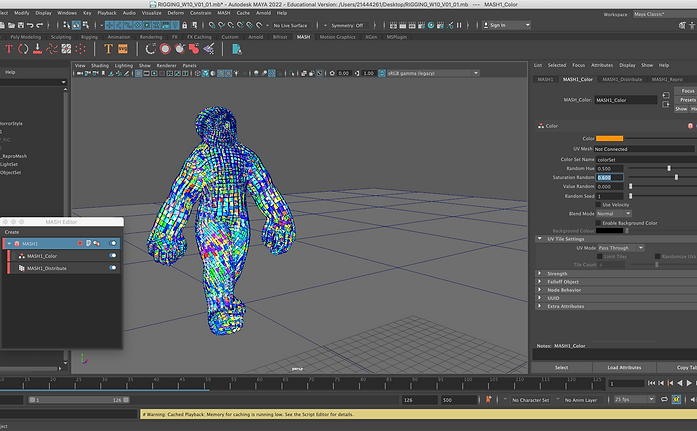
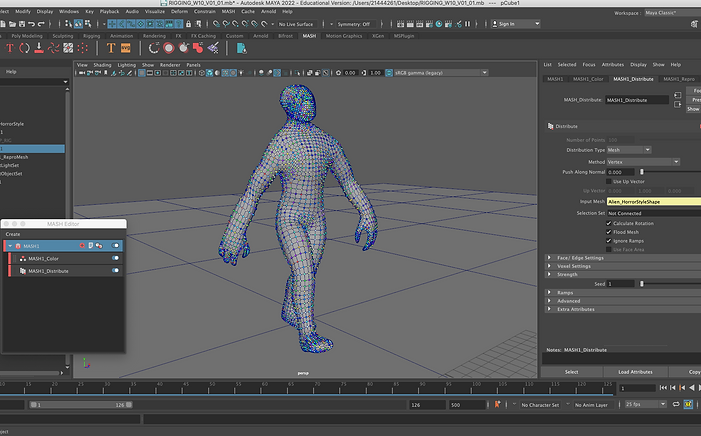

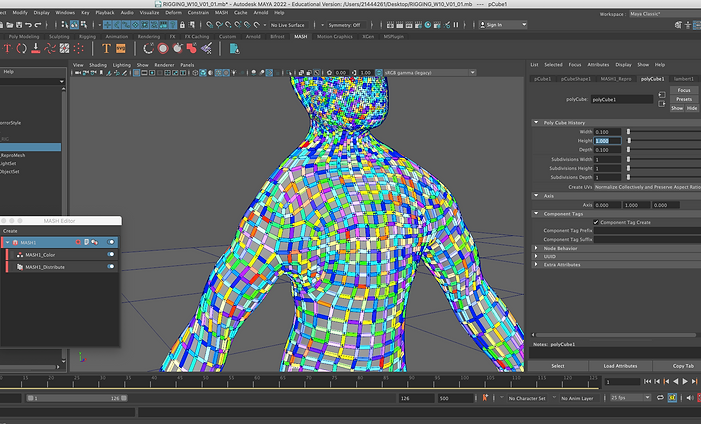


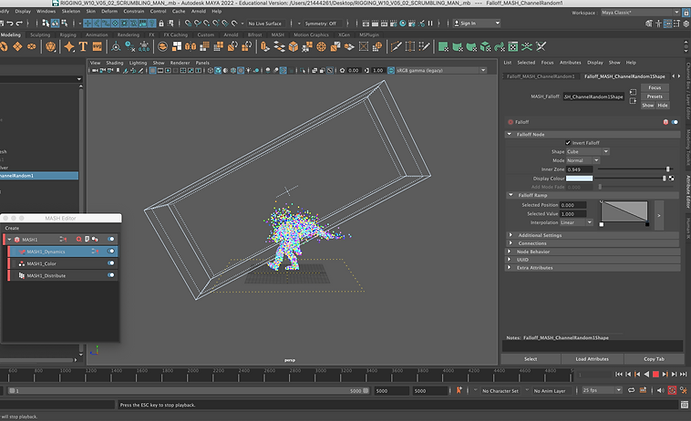
Crumbling cube man (Arnold Render)
WEEK 11: Spline IK
We looked at Spline IK in this lesson of the module. With a Spline IK handle, we can control a joint chain using a NURBS curve. The spline IK handle makes the joints follow the curve. Also, the spline IK handle adds twisting control to our joint chain, giving us more control over the orientation of the joints. During the lesson, I made the Spline IK handles for a simple cat with a spine rig already skinned to it. Below are some important steps of the process.

The spine joint chain is skinned to the mesh properly. Next, it is time to make IK handles for the joint chain.

I headed to Skeleton -> Create IK Spline handle.

Auto Simplify Curve option. When on, it automatically creates a NURBS curve with the specified number of CVs.

Auto Simplify Curve option. When on, it automatically creates a NURBS curve with the specified number of CVs.

Cluster deformers let us control a set of points on the object (like CVs and vertices) with varying amounts of influence. I made clusters for the curve CVs.

Clusters created.

Here I wanted to make controls for the clusters. I put each control in a group with itself and used the group as the offset.

To snap a control to a joint, I selected the offset and the joint and used Match All Transforms.

Then rotated the child (the control) and used Freeze Transformations.

Then constrained the child (control) to the joint with Point constraint.

Lastly, parented all controls to each other.

Here I was going to add more joints to the joint chain I had already made and skinned. To do that, I need to add the influence of it to the mesh to be able to paint skin weight for that.

Skin -> Edit Influences -> Add Influence.
WEEK 12: FUR
This week we went through a workflow for applying XGen fur to our characters. We were introduced to XGen Interactive Grooming tools to make fur for a character. Below is the result I got from playing around with various XGen Interactive Groom tools and workflows.
Assignment 02: Organic Rig
For this assignment, I decided to create a new organic character and demonstrate various techniques I learned during the second part of the module. First, I made my teddy bear and textured it using Substance Painter. Then, I made a rig for my teddy bear. Next, I painted skin weights to bind my character to the rig. Then, I applied mocap to my rig to have my character walk naturally. Finally, I created fur for my teddy bear using XGen Interactive Grooming tools.
Rendered sequence (Arnold)
Important note: the sequence was rendered with relatively low sampling rates because my computer could not handle a higher sampling quality. As a result, the rendered sequence (particularly the XGen fur) may seem noisy.
The processes and workflows (video)
Video with sound.