Lecture 1
During the first lecture of the course, we got hold of the module's main aims and objectives. Besides, we looked at the Unity game engine and learnt how to work with its interface and assets. For practice, we downloaded and imported the LoPoly Environment Pack from the Asset Store and tried to play around with it.
Asset Store
We can download assets, plugins and various free and paid content from Unity Asset Store. To access the Asset Store, we may find it within Unity or go to https://assetstore.unity.com in a browser. To familiarise ourselves with the interface, I downloaded LoPoly Environment Pack and imported it through Package Manager in Unity.
.png)
.png)
Importing the package and all its elements to Unity
Player camera setup
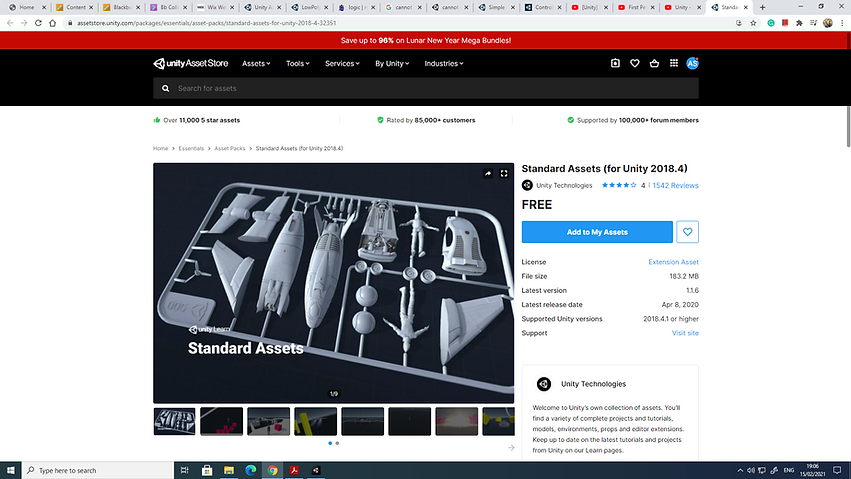
Adding Standard Assets from the Asset Store, we can set up a first-person camera controller easily to add player navigation to our scene.
.png)
Standard Assets is a big package and includes many elements and objects. To find the first-person camera, we head to Characters -> First Person Character -> Prefab -> FPSController within the Unity project panel.
Note: Adding the first-person controller, we need to delete the previous camera in the scene.
Note: To be able to use FPSController, we need to fix some files. The files can be found here: https://github.com/johnathanhales/UnityStandardAssetFixes. We need to put those fix files into the Standard Assets -> Utility inside our project folder.
Populating the scene with Prefab elements
I tried to create my own scene using prefab elements of LowPoly Environment Pack. Below is some of the scene I made:
.png)
.png)
Lecture 2: Maya Scene Organisation, Sculpting and Displacement
During lecture 2, we explored Maya Scene Organisation, Display Layers, Sculpting and Displacement.
Some important techniques and workflows we got introduced to:
Camera Clipping Planes:
Do objects disappear when dollying out? We need to change "Far Clip Plane" in Perspective camera attributes.
.png)
Grouping and Hierarchies
We use Groups and Hierarchies techniques to organise our assets and make the navigation and management of them easy.
Isolate selected display
We can isolate the selection in the viewport in Maya when working with them in order to focus on the modelling and texturing of specific objects in the scene. To isolate the selection, go to the Show menu at the
top of the viewport -> Isolate Select -> View Selected.
Instancing and Duplicates
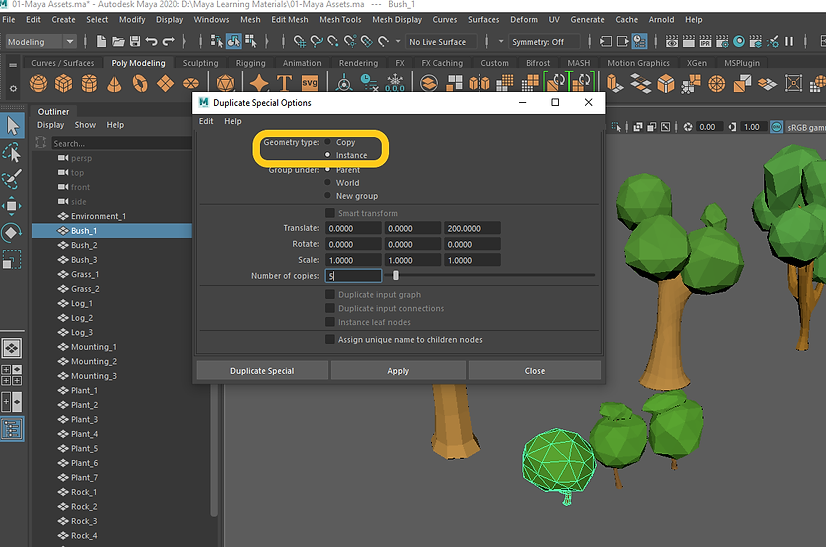
Instanced duplicates are useful for modelling or laying out complex scenes. When we use instancing, every time we edit the original object, Maya updates the instanced versions as they have reference to the original.
.png)
.png)
Hiding and Unhiding objects
We can hide and unhide objects in the scene by going to Display -> Hide -> Hide Selection (Ctrl+H) and Display -> Show -> Show Selection (Shift+H)
Display Layers / Display Attributes
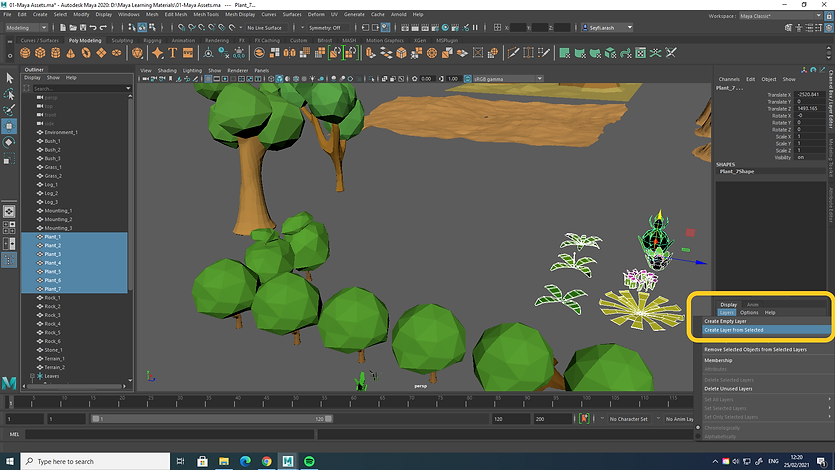
We use Maya's Display Layers and Display Attributes to organize a scene better. Select objects, then go to the Channel Box/Layer Editor -> ‘Display’ tab -> Layers -> Create Layer from Selected.
.png)
We can toggle the layer between different modes: Standard mode, Template or Reference. Template mode displays the objects in the wireframe and makes them unselectable in the viewport. Reference mode makes the objects visible but unselectable.
.png)
These options can also be set for each object from the Attribute editor under the object’s Shape node, as below:
.png)
Poly Count and Poly Display
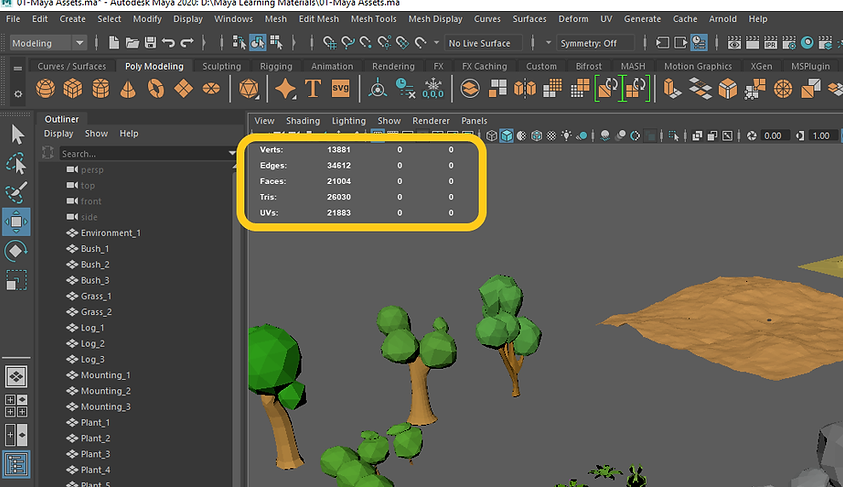
We use the Heads Up Display tools in Maya to get information on the scene, such as Polycount, which can be critical to some projects. To enable Polycount, I go to the Display menu -> Heads Up Display -> Poly Count.
Note: The second number of Tris is important for us to notice when we select an object and want to find out what is its polycount.
.png)
Smooth Mesh Preview & Smoothing
To make the model look less angular more smoothed, go to Mesh Display -> Soften Edge. We can also apply the smooth to the object permanently by going to Mesh -> smooth.
Soft Selection modelling
To enable Soft Selection, double click the Move tool in the Toolbox on the left in Maya. It will display the tool Settings. Expand the Soft Selection section to set the tool.
Note: Shortcut to enable Soft Selection mode: B
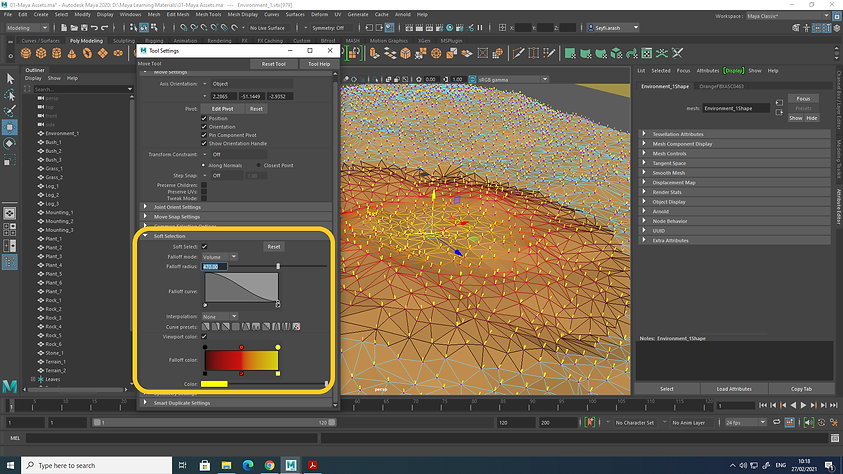.png)
Sculpting Tools
Maya has some built-in Sculpting tools that allow you to sculpt on surfaces like a plane, etc. We can either go to the Sculpting shelf and double click on the Sculpt tool to open up the settings and sculpt or go to Mesh Tools -> Sculpting Tools.
Note 1: To change the brush's size: Press B and drag the mouse to the left or right.
Note 2: To change the strength of the brush: Press M and drag the mouse to the left or right.
.png)
Displacement Maps
To add more details, we can use Displacement maps as stamps within Maya to draw on the surface using an image and create Displacement.
.png)
Lecture 3: Intro to Environment Modeling and Texturing
This week, we learnt more about different methods for modelling and texturing the environment in Maya. We looked at how to create trees and foliage in Maya considering LOD (level of detail) and using some texturing and modelling techniques.
Displacement maps and stamps
We can find different images to use as displacement sculpt stamps in Maya’s Content Browser. To find all sculpting stamps within Maya, go to Windows -> General Editors -> Content Browser.
_p.png)
_p.png)
Stamp images on Textures.com
Click here to check out various resources and assets on Textures.com.
Alpha channel textures - Alpha leaves
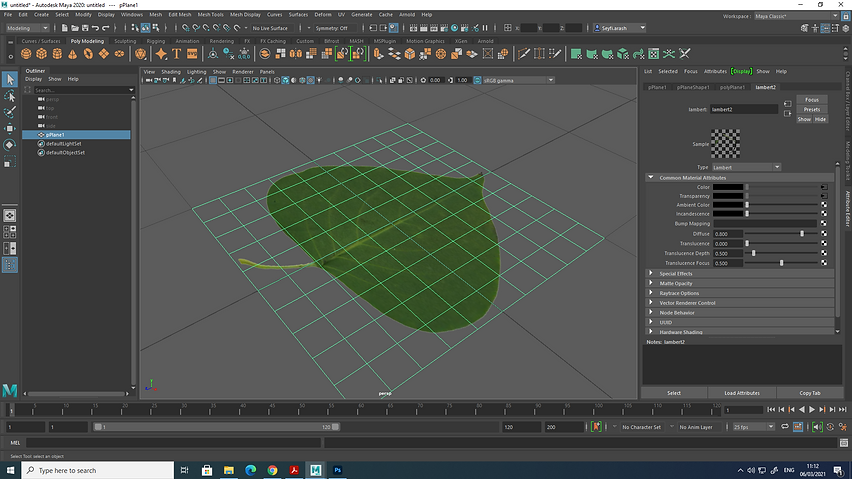
Alpha channels can be used in textures to build detail elements in our environment assets, such as plant leaves and branches. Below, I only created a plane, assigned Lambert to it, and loaded a Tif image with Alpha channels. The Hypershade window can show us the shading network of the leaf.
_p.png)
_p.png)
Then, to create a more sophisticated branch, I duplicated my leaf models and placed them around a stalk. The result was as following:
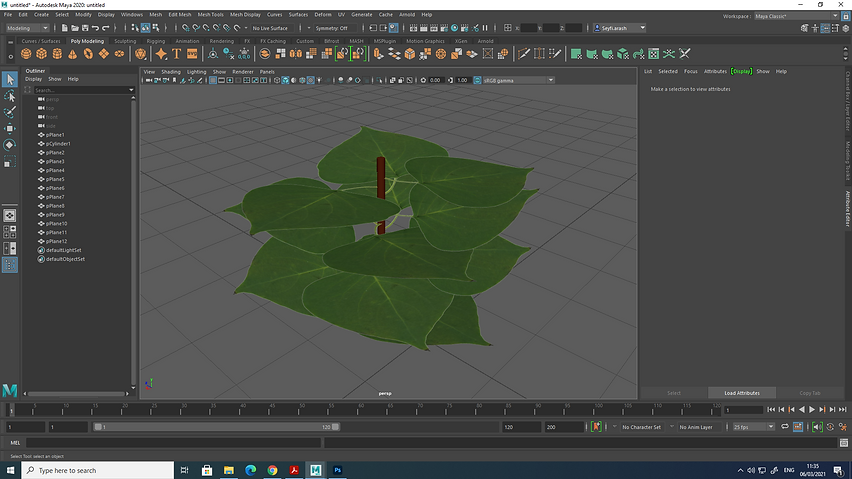_p.png)
Note: to rectify the incorrect behaviour of showing depth in the viewport, go to the Renderer menu above the viewport -> Viewport 2.0 -> Set Transparency Algorithm to Depth Peeling or Alpha Cut.
_p.png)
Lecture 4: Lighting and rendering with Maya's Arnold & Viewport 2.0 renderers
By looking at Maya's Arnold Renderer, Viewport 2.0, and the Unity Game Engine, we explored lighting for realtime and offline rendering this week.
Depth map and raytraced shadows
The results of using either depth map shadows or ray traced shadows are almost identical, but depth map shadows require less time to render.
Learn more about depth map and raytraced shadows in Maya: click here!

Maya light types
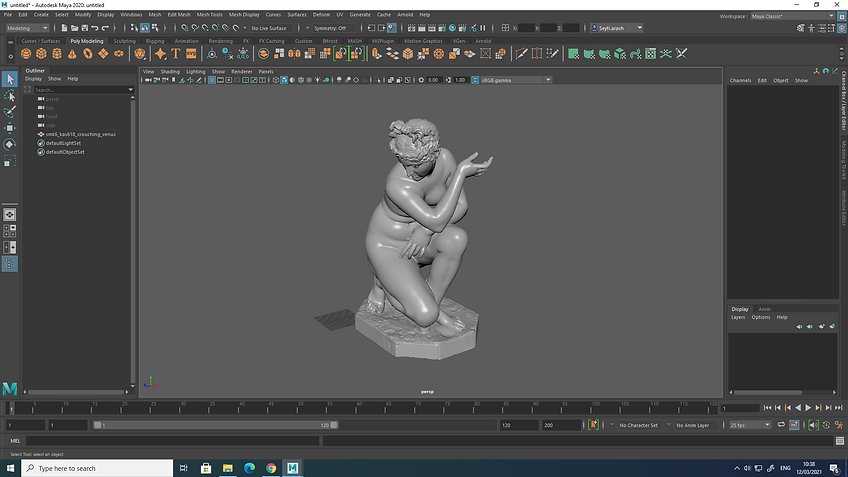
There are different light types in Maya, and some are suitable for specific purposes and situations. Having a good understanding of lights in Maya could help us determine what light we need to use inside our scenes. To play around with different lights, I imported a .STL file into Maya.
Note: To import a .STL file into Maya, make sure the stlTranslator.mll plugin is loaded.
To add light to the scene, go to Create -> Lights. These lights under this menu are different from the Arnold lights.
.png)
.png)
.png)
Light blockers
Add an aiLightBlocker under the Light Filters section of the Attribute Editor when the light is selected.
.png)
I changed the shape of the filter to a plane, as below:
.png)
Play around with Density to get the desired result:
.png)
Spot lights' settings
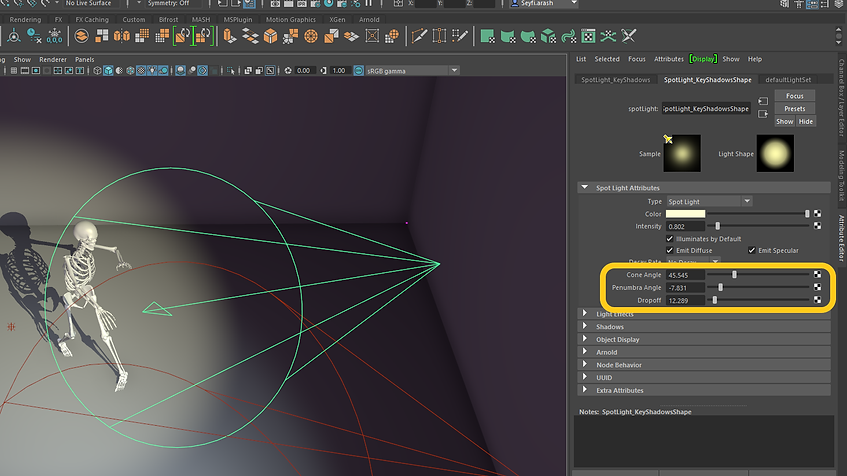
When using Spotlights in Maya, the Cone Angle, Penumbra Angle, and Dropoff settings adjust the light's spread and range.
.png)
Note: To check if the light has Depth Map or Raytrace Shadows turned on, go to Shadows -> Depth Map Shadow Attributes or Raytrace Shadow Attributes. See below:
.png)
Two important settings for real-time rendering (ViewPort 2.0)
Ambient Occlusion (AO) adds shadow detail to occluded areas and Anti-Aliasing (AA) smooths edges. Enable them by heading to ViewPort 2.0 settings.
.png)
Lecture 5: Maya organic modelling, UV unwrapping and ZBrush detailing
This week we explored organic subdivision surfaces modelling in Maya, UV Mapping and the export/import pipeline with ZBrush, making surface details and normal maps.
OBJ export to Zbrush
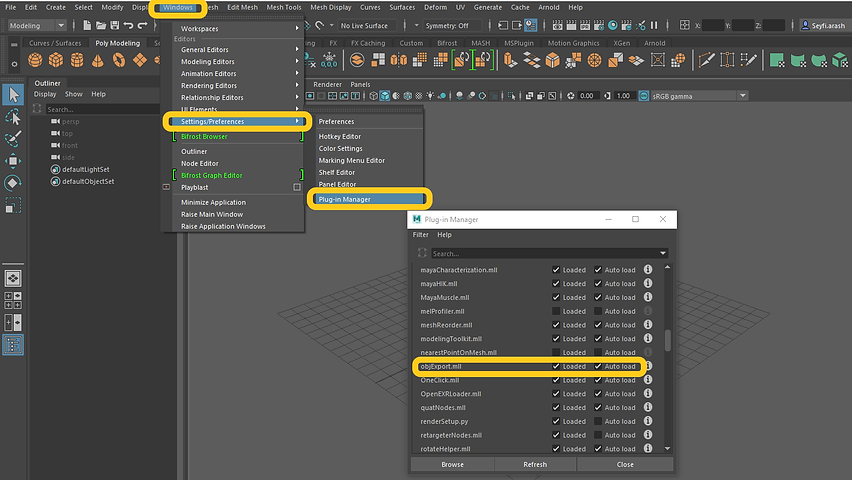
To export a model to OBJ format from Maya to Zbrush, we need to go to Windows -> Settings/Preferences -> Plug-in Manager and load the objExport.mll plugin there.
.png)
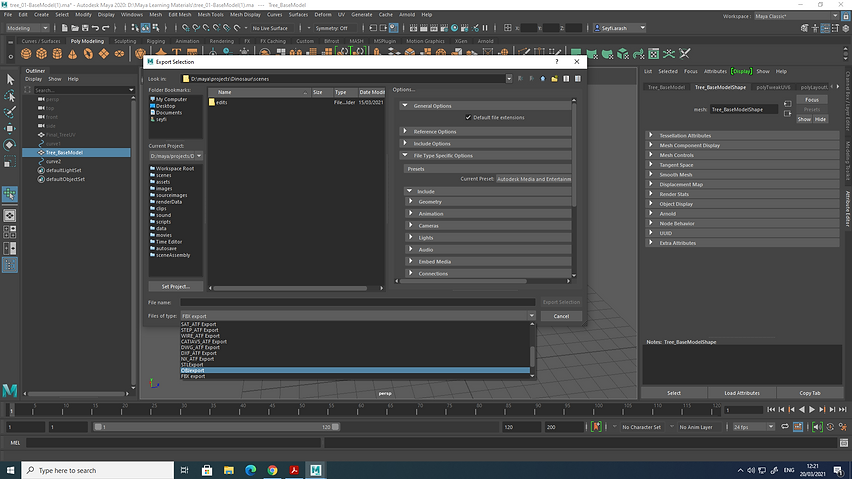
To export the OBJ file, go to File -> Export Selection and select OBJexport file format.
.png)
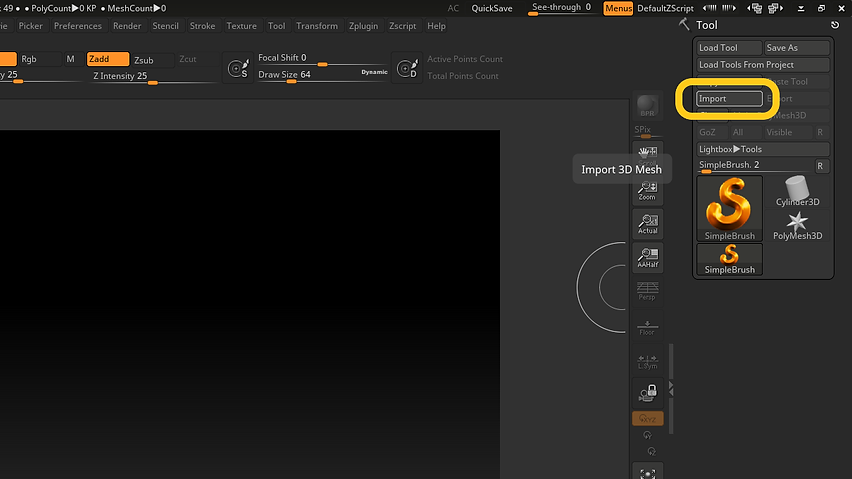
Inside Zbrush, import the OBJ file and then subdivide it a few times.
.png)
Below is a tree model brought from Maya into Zbrush.
.png)
Pixologic Alpha Library
To get access to the Pixologic alpha library, click here.
Detailing in Zbrush using Alpha Stencils
.png)
Alpha -> Import.
.png)
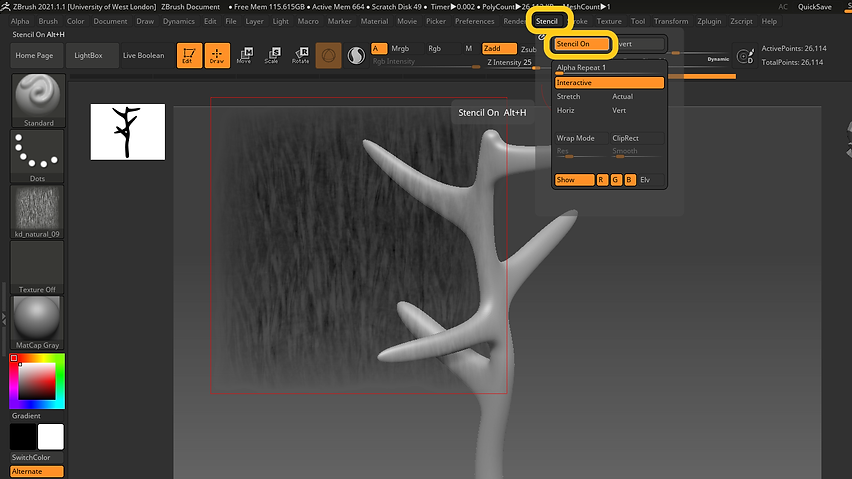
Alpha -> Make St. Making Stencil from the imported Alpha stamp.
.png)
Turn Stencil On.
.png)
Draw on the surface using the stencil. Press the spacebar to bring up the gizmo and move/rotate the stencil around
Exporting TIF from Zbrush
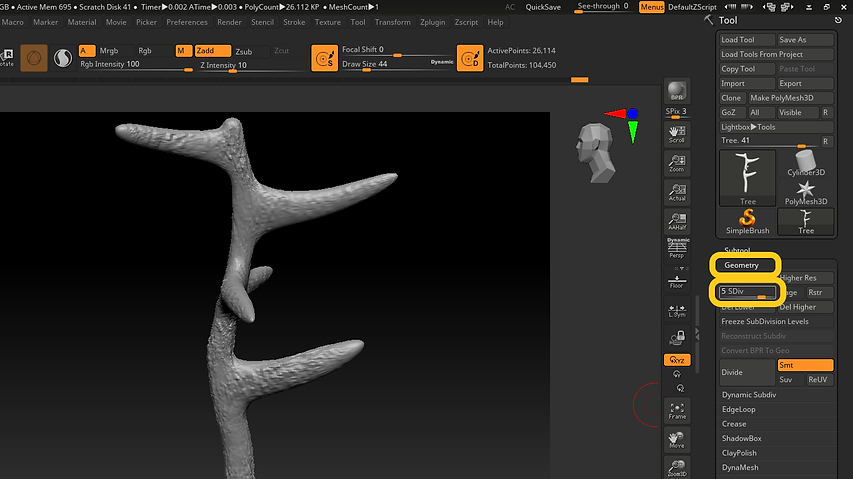.png)
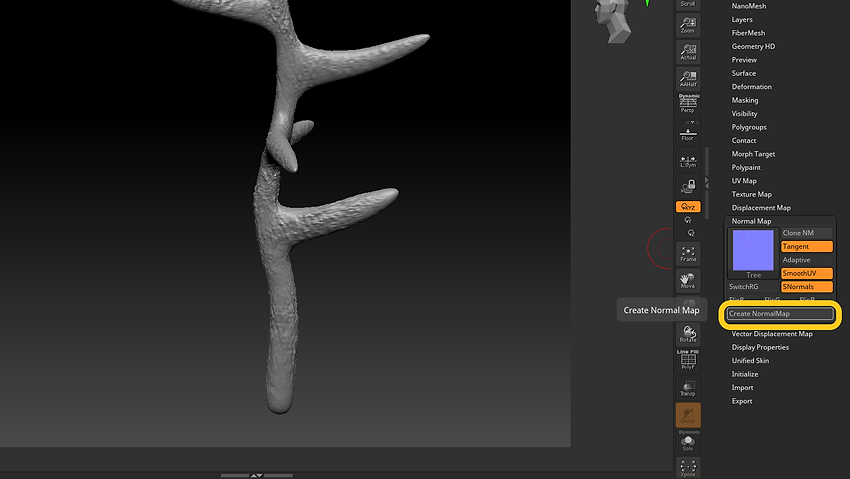
Note: we cannot create a Normal Map when the object is at the highest subdivision level. Therefore, we first need to bring the subdivisions one level backwards.
.png)
Created Normal Map.
.png)
Pressed Clone NM before exporting the map.
.png)
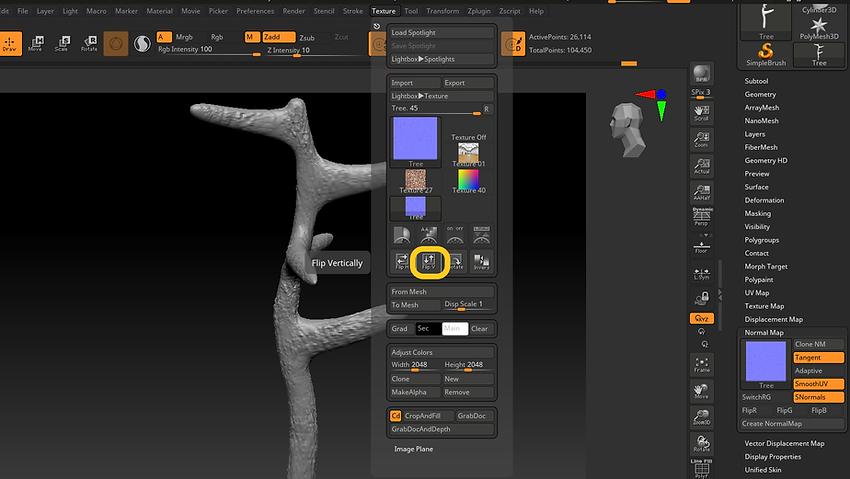
Pressed Flip Vertically before exporting.
.png)
Exported the map as a Tif file.
Bring the Normal Map into Maya
.png)
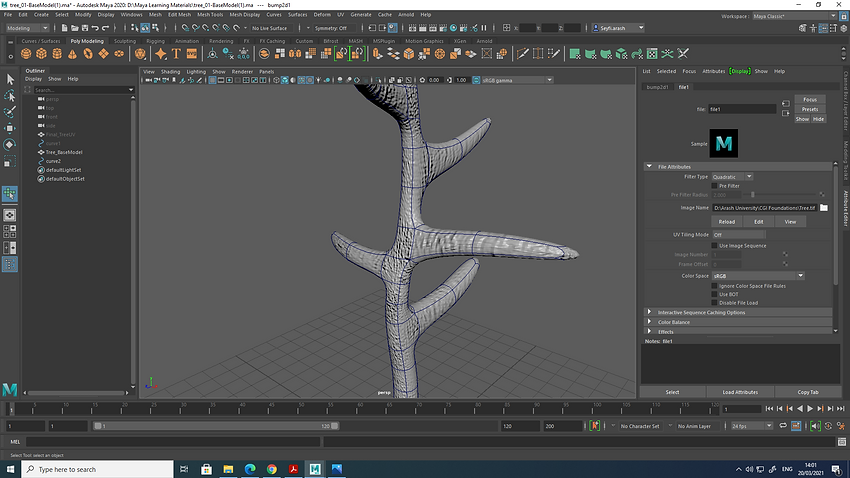.png)
UV unwrapping workflow
Understanding UVs is one of the most important parts of 3D modelling and texturing. This crucial and handy concept is explained by me here.
Assignment 1: CGI Dimensions of Practice
Final Renders
Bellow is my baby T-rex dinosaur, modelled from a simple cube in Maya, textured and developed in Substance Painter and Zbrush.


Some techniques and workflows I used
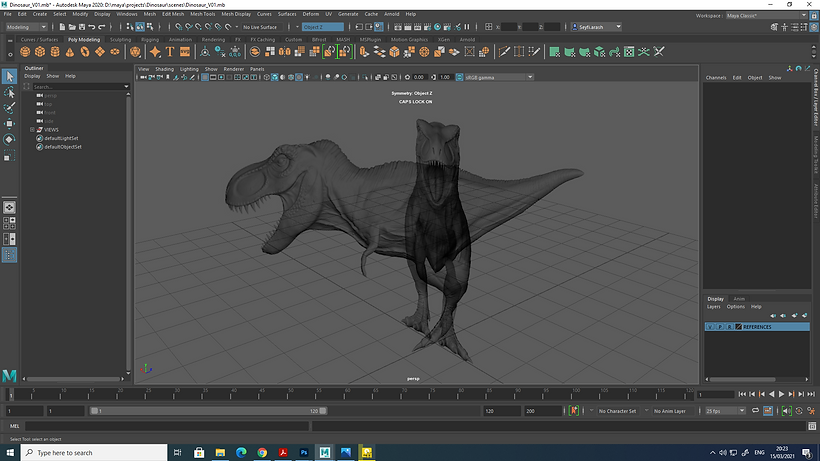.png)
I set up reference images as display layers.
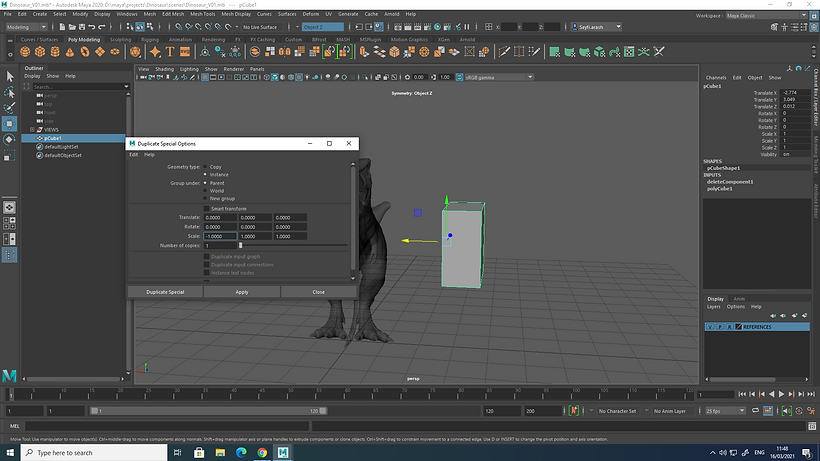.png)
Used Duplicate Special Options to create an instance from the object and make the modelling easier and faster.
.png)
Made a perfect cube by making an instance from half of it.
.png)
Started to move various edges and vertices to shape the cube a bit. Checked different views at every single step.
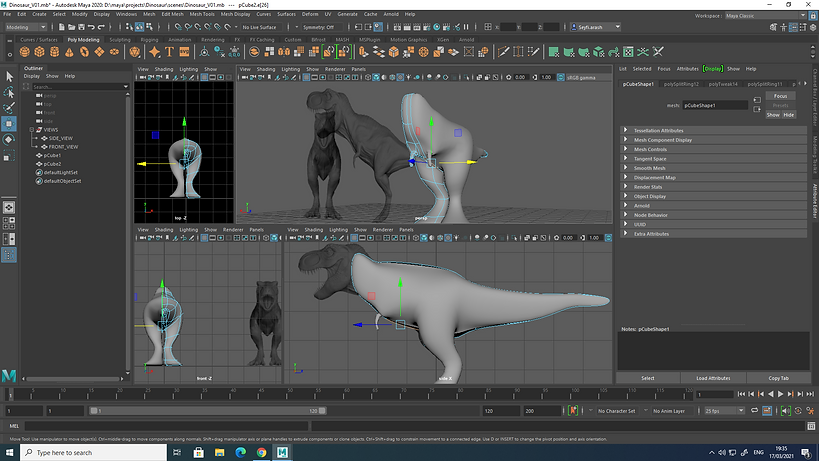.png)
Shaped hands and legs a bit. This was just a starting point. I worked on details later on.
.png)
I found Relax Tool a very handy tool to relax the mesh a bit.
.png)
Tried to delete history from time to time as progressing through modelling.
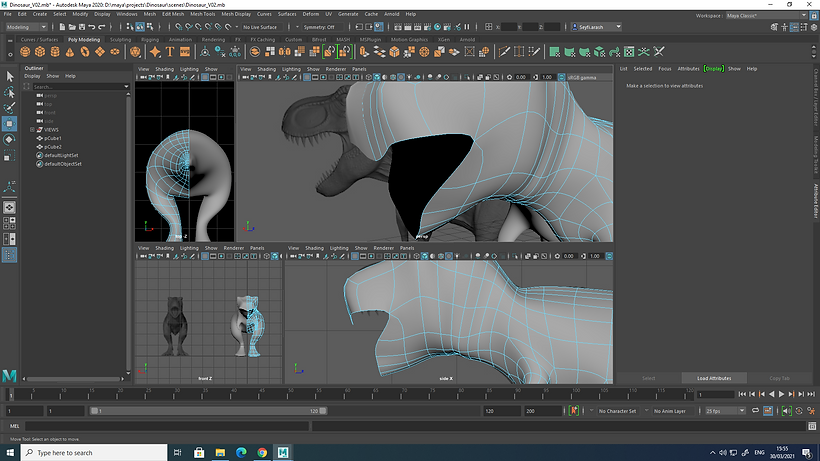.png)
Started to work on the mouth.
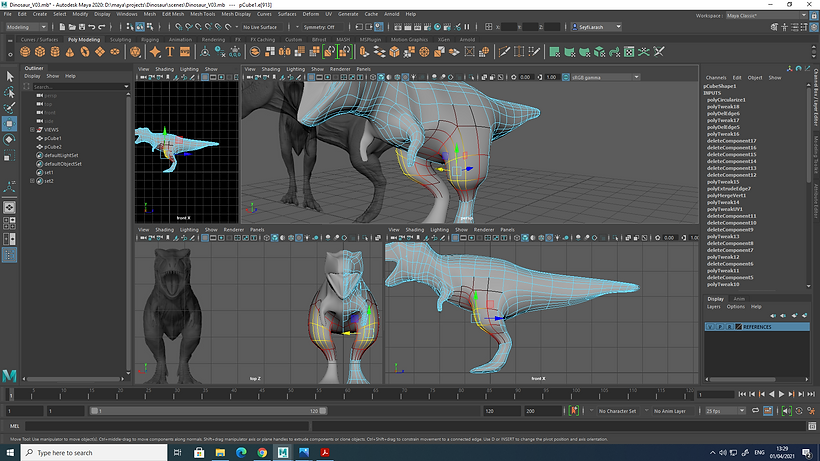.png)
Used Soft Selection.
.png)
Worked on the eyes.
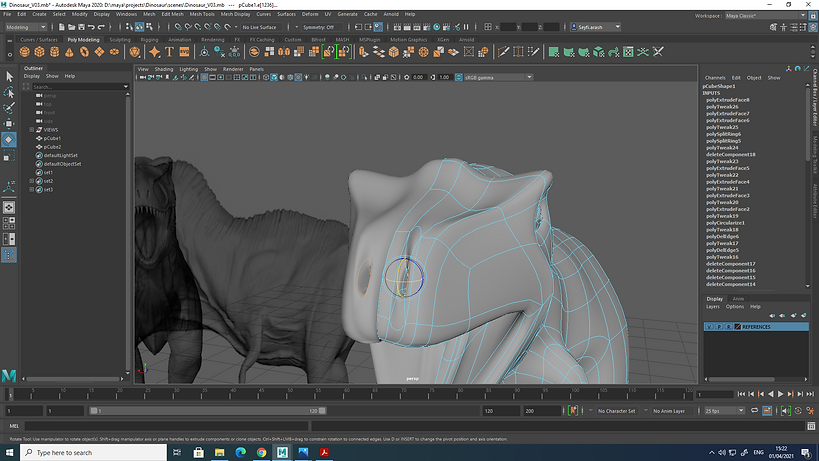.png)
Modelling the nostrils.
.png)
Used extrusion a few times to shape fingers and nails.
.png)
Fingers and nails modelled.
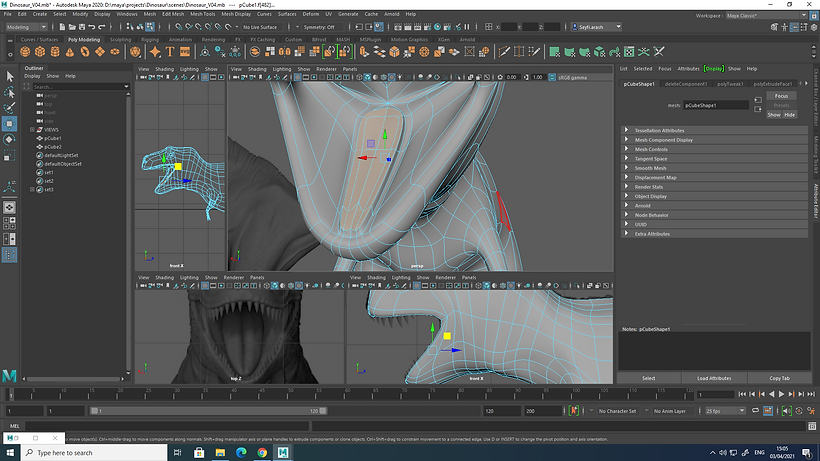.png)
I went on to model the tongue, using extrusion again.
.png)
Tongue modelled.
.png)
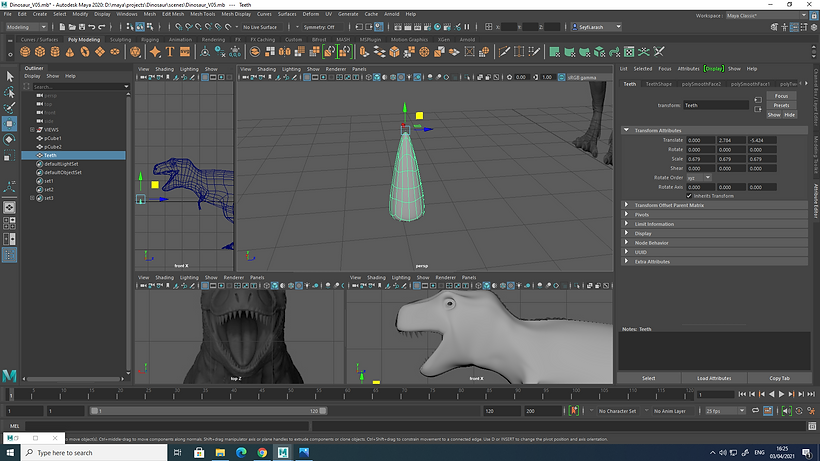
Made another cube, this time to model teeth.
.png)
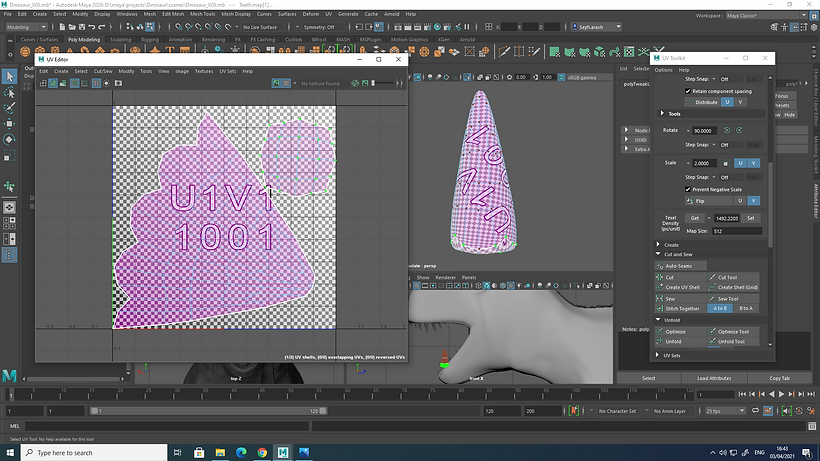
Shaped a tooth.
.png)
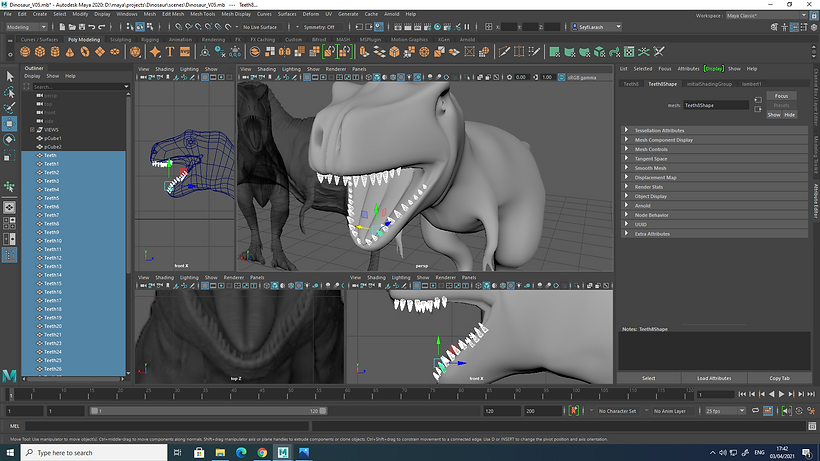
Set up its UVs before moving on to details.
.png)
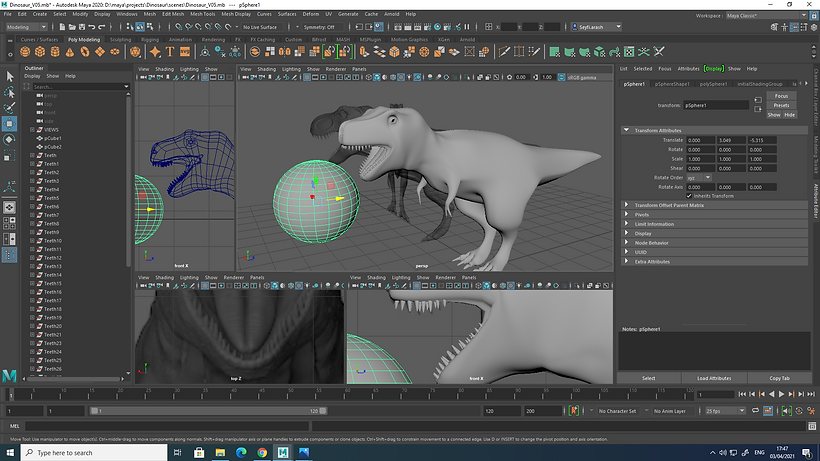
Duplicated the tooth.
.png)
Sphere for the eyes.
.png)
Deleted the inner part of the eyes.
.png)
Placed the eye in the place.
.png)
Layed out the UVs.
.png)
The eyes' UVs.
.png)
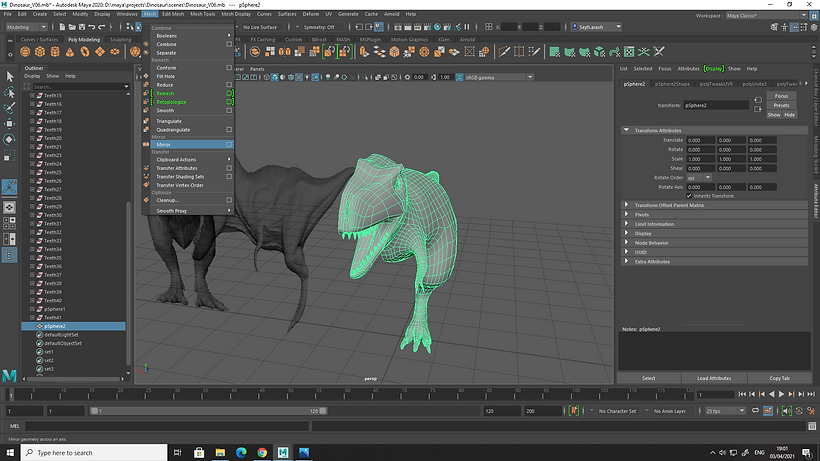
Important: Mesh -> Mirror to mirror the half of my dinosaur.
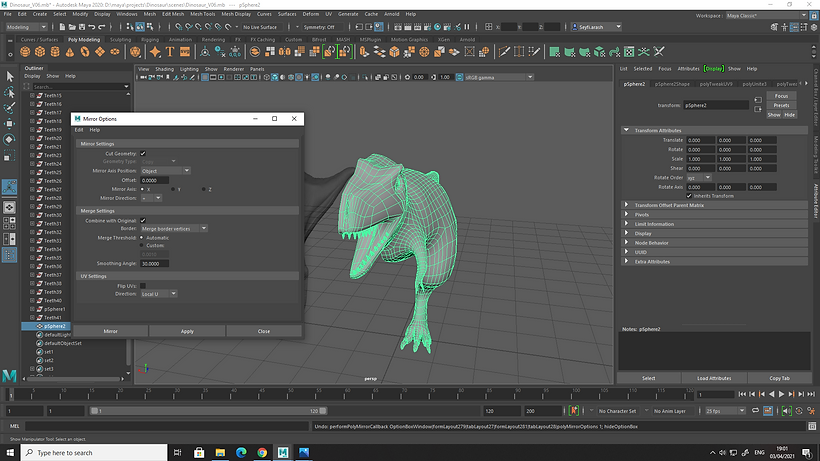.png)
Set "Mirror Axis Position" to "Object", and "Mirror Axis" to "X"
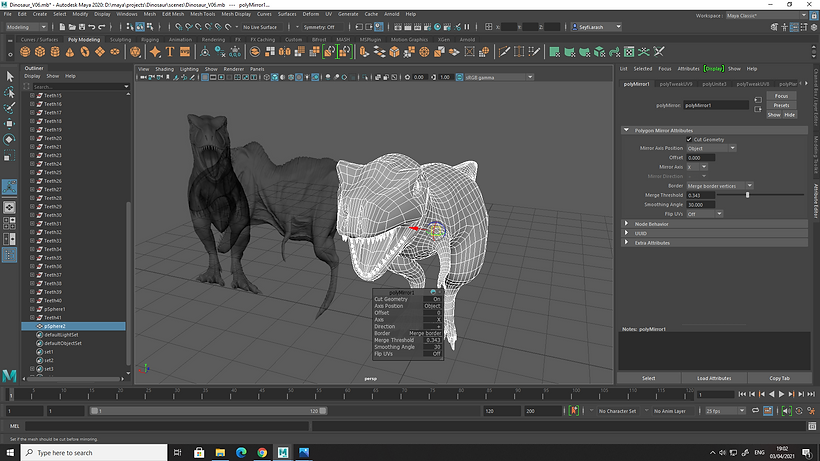.png)
The result of mirroring the mesh.
.png)
Important: ran Cleanup to find faulty non-manifold geometry.
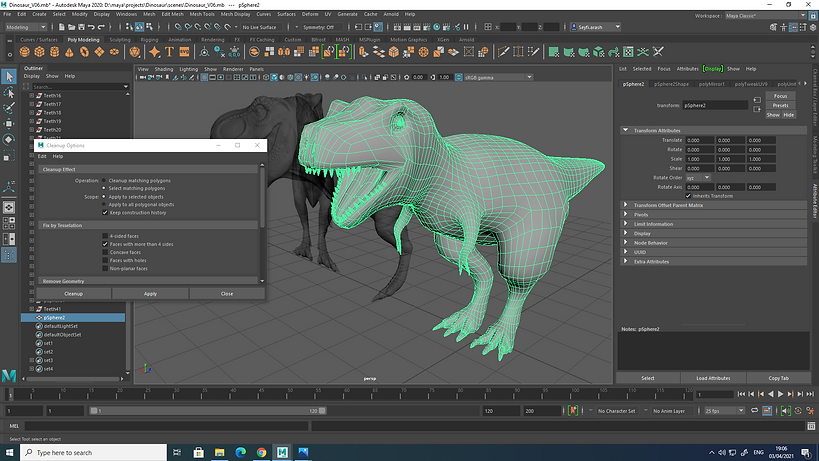.png)
Set Operation to Select matching polygons.
.png)
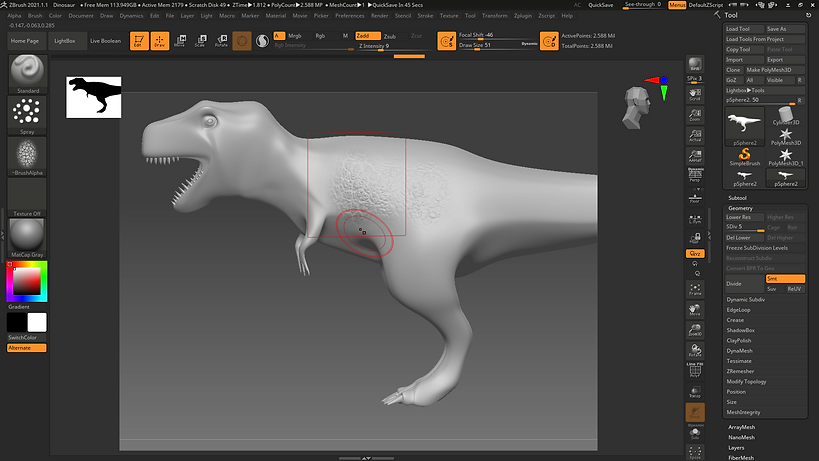
Took my T-rex to Zbrush to use alphas and stencils.
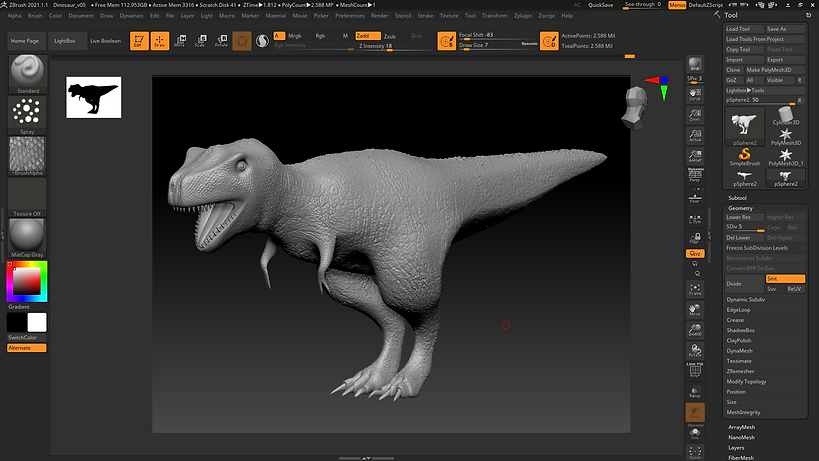.png)
The result.
.png)
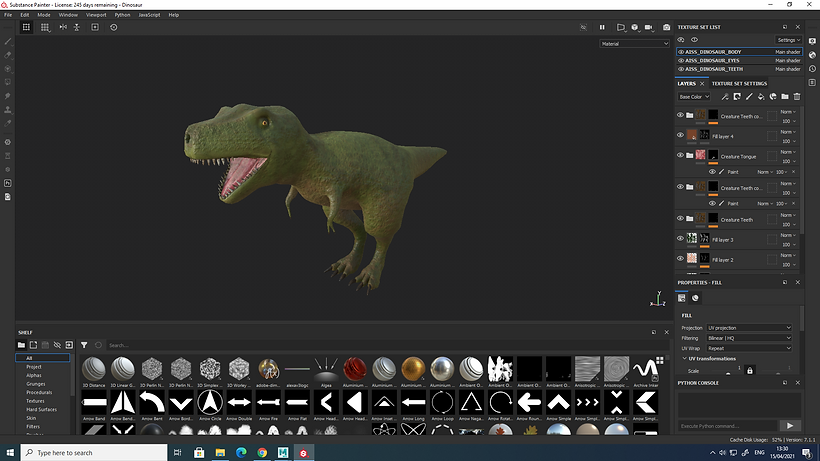
Took it to Substance Painter for painting and texturing.
.png)
Used various layers and materials. This is the result.
Week 8: Substance Painter
This week, we looked at the Substance Painter user interface, material workflows and render settings. I downloaded a free asset and tried to practise by working with different layers and applying various materials.
Introduction to Substance Painter
I have explained some tips and techniques related to this powerful piece of software here (click here).
Practising Substance Painter
.png)
I added a fill layer with red colour. Then, added a white mask and a generator.
.png)
Selected Metal Edge Wear. It applies the red colour to the edges.
.png)
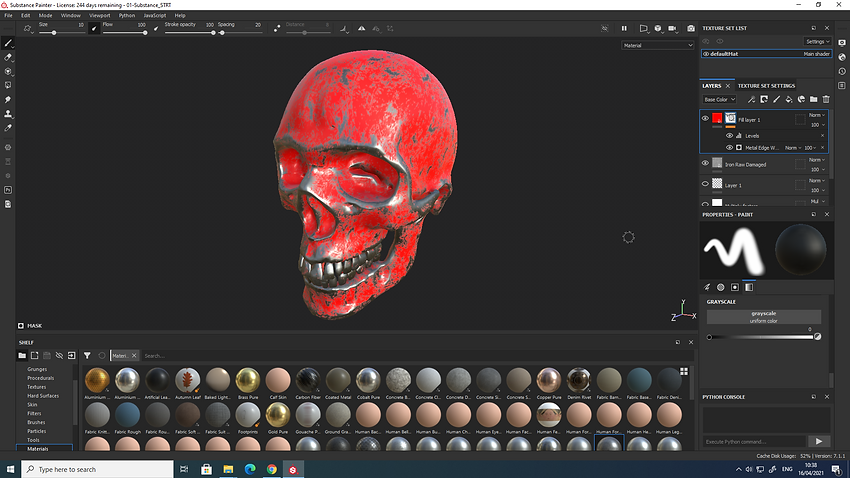
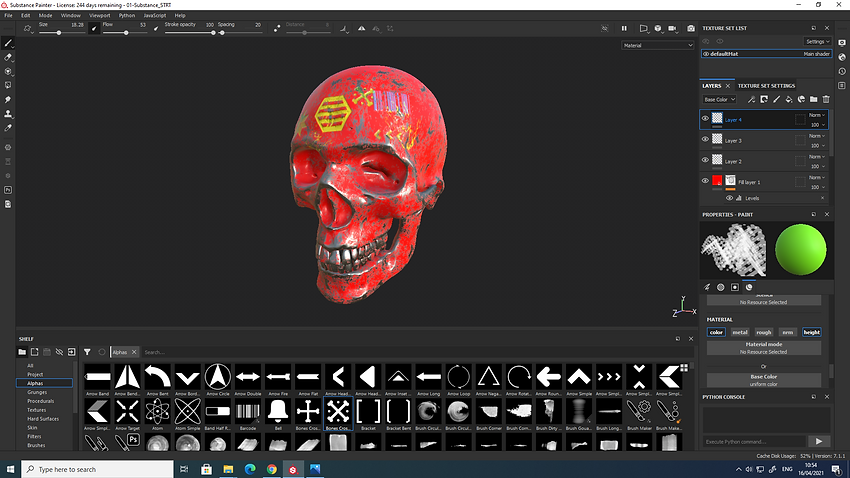
This is the result, but I wanted the reverse effect. So needed to invert the mask to apply the red colour to the skull and have the edges grungy.
.png)
The result of the mask reversed.
.png)
Made different paint layers (base colour + height channels) and used alphas.
.png)
Iray renderer settings.
Week 9: Substance to Maya
This week, we practised exporting Substance maps and textures and set them up in Maya's Hypershade for rendering with Arnold.
Practising Substance Painter and experimenting with different workflows
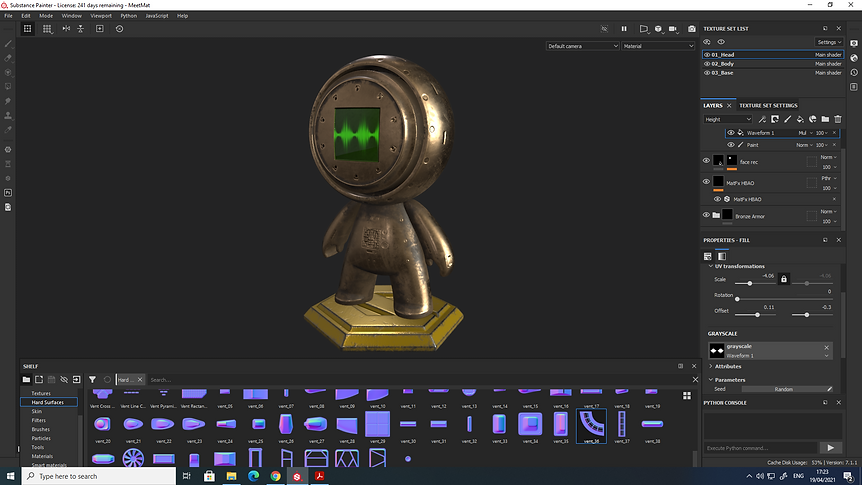
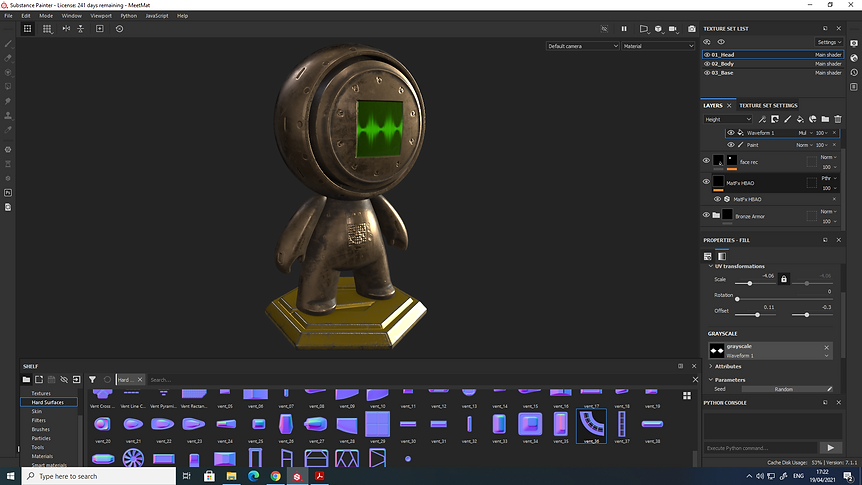
As a way of skills and knowledge consolidation, I tried to learn and practise various useful workflows and techniques in Substance Painter. Using the MeetMat sample as a jumping-off point, I developed my skills of painting and texturing with Substance.
Result
.png)
.png)
Some tips and techniques
I used different Hard Surfaces as the Normal channel of a paint layer. Note: Set the blending mode for a normal paint layer to Normal Map Detail.
.png)
To have the bumps and Normal textures affected by the Smart Material, I moved the Normal paint layer inside the folder of Smart Material, at the bottom of its layers. Then, I added an anchor point to the paint layer.
.png)
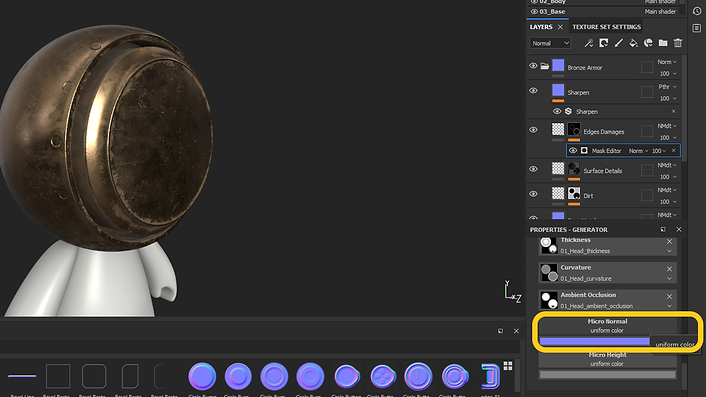
To have the newly added normal textures affected by the Edges Damages layer of the Smart Material, I click on the layer Mask Editor, a generator, and headed to Micro Normal to introduce the anchor point I previously added.
.png)
Selected my Anchor Point.
.png)
Set Referenced Channel to Normal.
.png)
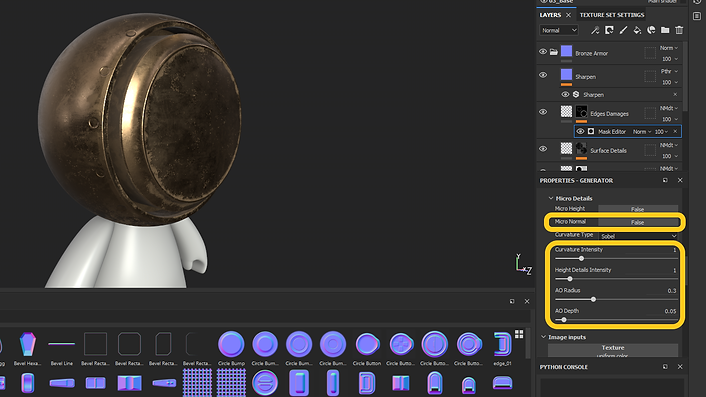
Set Micro Normal under the generator properties to True, then played around with its settings.
.png)
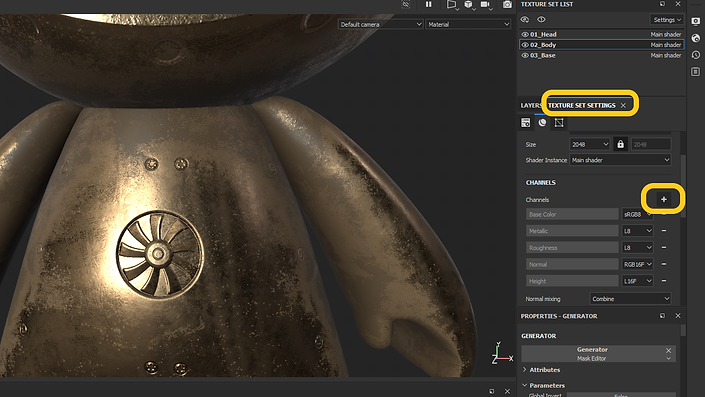
As a way of adding more details and realness, I added an Ambient Occlusion channel to my texture set. Now I am ready to use AO filters.
.png)
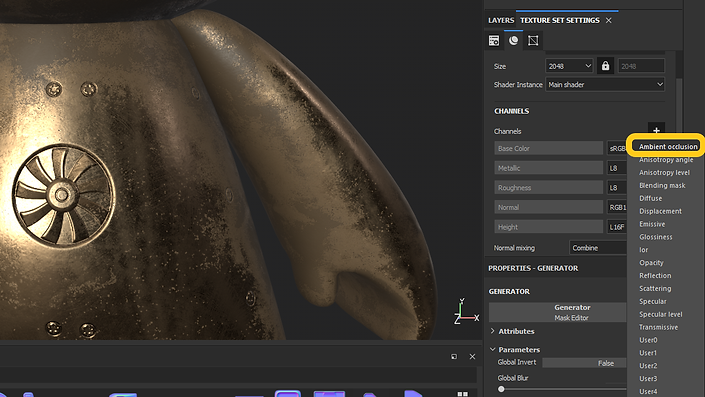
Added AO channel.
.png)
Found the MatFx HBAO filter in the shelf, dragged and dropped it on top of my layer stack
.png)
Change Channel Source to Normal.
.png)
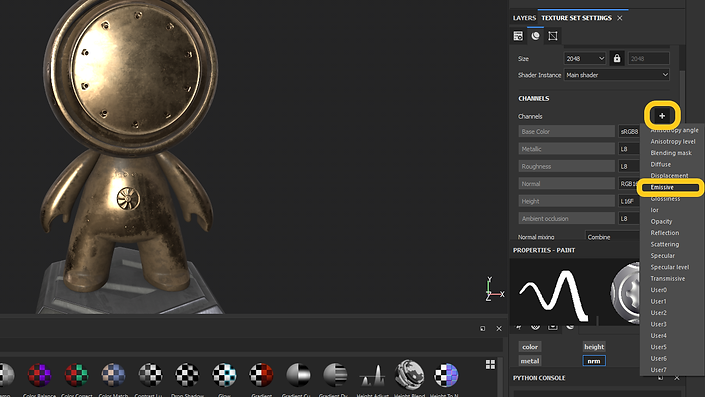
Added another channel, this time an Emissive one.
.png)
Added Emission to a Fill Layer, and used masks. To be able to use multiple masks, I set the blending mode to Multiply.
.png)
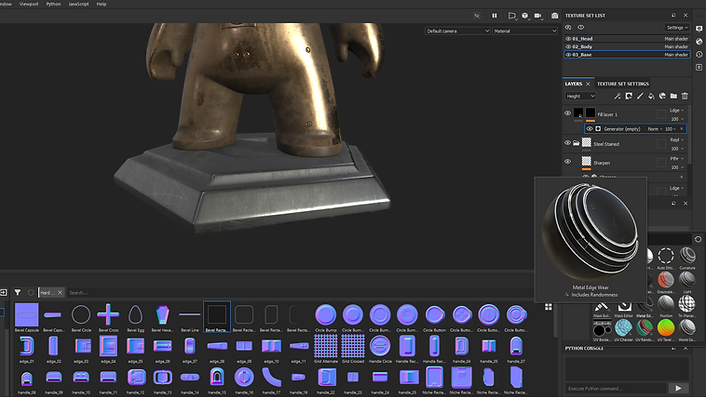
Used Metal Edge Wear generator.
.png)
Substance to Maya

Shading Network (with Ambient Occlusion plugged into it)

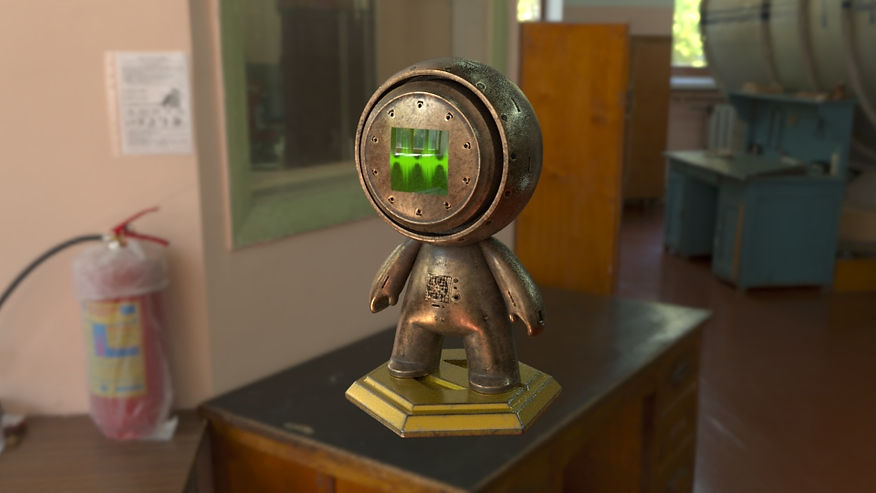
Render by Arnold
Assignment 2
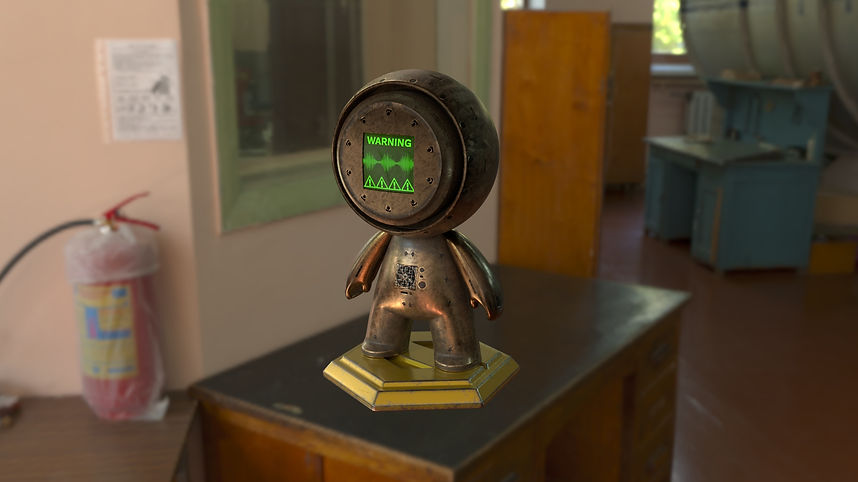
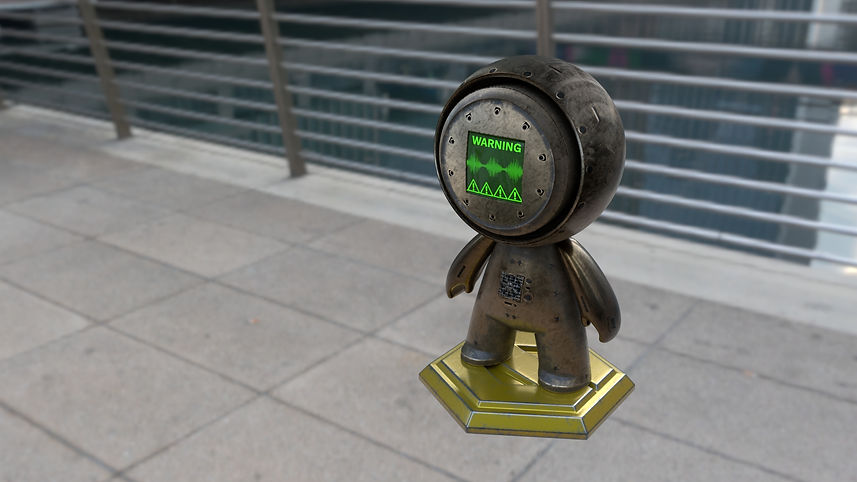
For assignment 2, I continued to work on my shading and texturing skills and take my MeetMat texturing to the next level by adding more details, exploring new workflows and polishing my texturing. The aim of this assignment was to demonstrate a clear understanding of the material, shading and texturing techniques across packages such as Maya and Substance Painter. I used both of them for the purpose of this assignment.
I have already recorded and shown all development works and techniques I used for texturing my MeetMat sample. Here, I will show a few new render images to demonstrate how I developed my texturing further.

Week 12: NURBS & Poly Surface Modeling
We looked at NURBs in Maya this week. NURBS (Non-Uniform Rational B-Splines) are one of the geometry types available in Maya for creating 3D curves and surfaces. Polygon and subdivision surfaces are other forms of geometry that Maya offers.
We can use NURBs in two ways:
-
Make 3D models out of NURBS primitives: simple 3D objects in the shape of standard geometric forms such as cubes, spheres, cones, and so on are known as primitives. Many 3D models can benefit from the use of primitives.
-
Construct NURBS curves that describe the basic outline of the 3D shape we wish to build, then utilise the curves to build NURBS surfaces.
For more information about NURBs modelling in Maya, click here.
Week 14: Lighting and Rendering
This week, we got a deeper understanding of lighting and rendering in Maya and Unity. In addition, we got to know how to reduce noise when rendering, by understanding where the noise is coming from. Inadequate sampling will often cause noise, but raising sampling for the incorrect rays might increase render times without removing the noise.
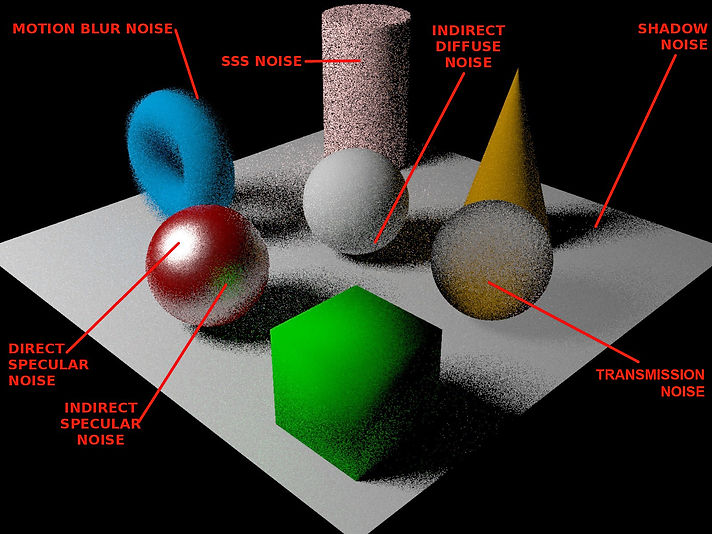
User guide to remove noise in Arnold: click here.
Change sampling settings by going to Render Settings -> Arnold Renderer -> Sampling.

Assessment 3: Personal Development
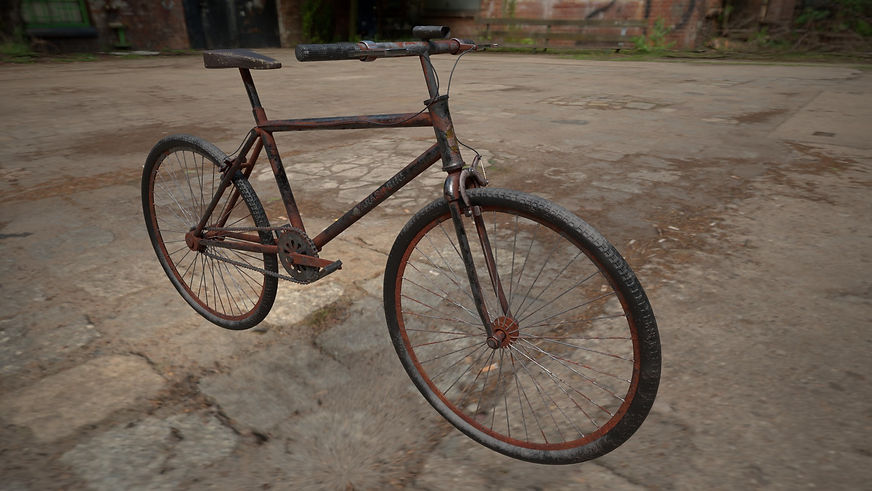
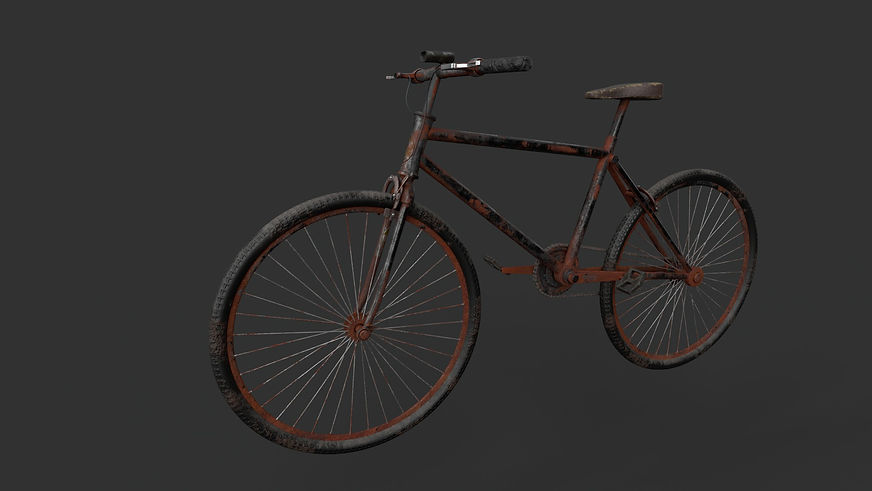
For this assignment, I decided to model and texture an old rusty bike abandoned for many years. I aimed to make a corroded, tarnished, and rust-covered bike, and I wanted it to seem natural and realistic. For this purpose, I used both Maya and Substance Painter, and I availed myself of various techniques and workflows.
Final Renders
Iray renders:
Arnold renders:

