Lecture 1
Lecture 1 enabled us to gain an insight into the digital image and what elements it is made up of. We learnt what Colour Bit Depth, Resolution, Channels, Image File Format, etc. are, but most importantly, we got a feel for Alpha Channel.
Alpha Channel
Alpha Channel basically determines the transparency settings of a pixel, colour or selections. It tells a pixel how transparent it is. Alpha is crucial for compositing and combining digital images and backgrounds.

Black colour in Alpha Channel represents the transparency, and White colour acts as the solid part of the picture.

The right-hand picture shows the Alpha Channel. Black colour shows a part of the picture which is going to be completely transparent. Therefore, as you can see in the left picture, the background (chequered) is invisible as a result of the Alpha Channel.
Stonehenge Task: Sky Replacement


I have replaced the sky using Select -> Colour Range in Photoshop.
Animal Hybrid Task
Here, I am going to combine two animal species into one, with Photoshop.
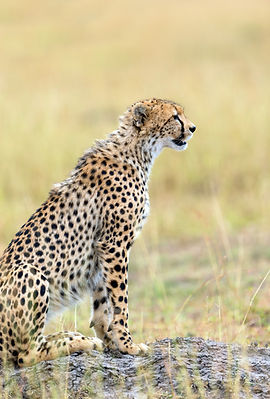
This is a wild African cheetah.
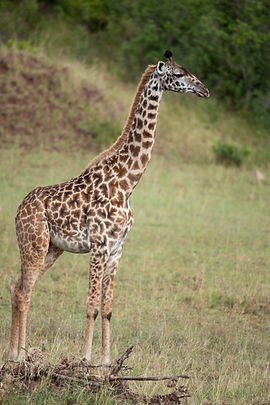
And this one, a giraffe living in Serengeti National Park (Tanzania-Africa)
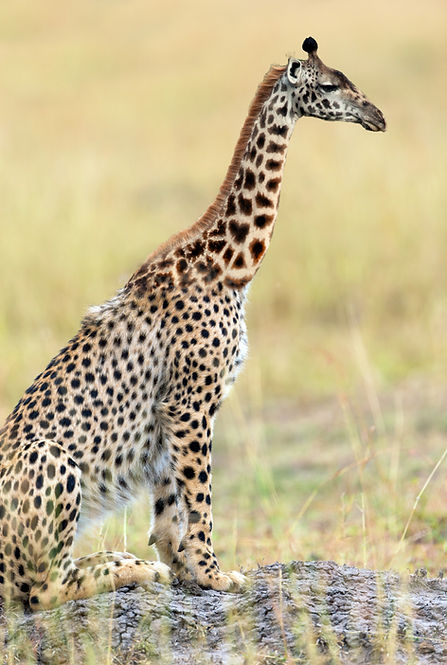
I named this guy "Cheeraffe", which is Cheetah + Giraffe.
The process
I used Object Selection Tool and then Edit In Quick Mast Mode, to select my giraffe's neck and head. I also used Select and Mask to refine the edges and rectify the selection area. Then, I played around with the Liquify filter to increase/decrease the dimensions of the selected neck.
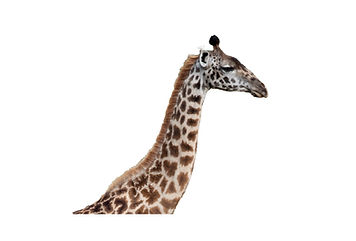
Next, I put the giraffe's neck on cheetah's body. I removed cheetah's head with Content-Aware Fill. Then, I added layer masks and tried to match both giraffe's neck and cheetah's body together. Finally, I played around with Colour Balance and similar Adjustments tools to adapt the colour of the neck to the new body. Took time, but I am happy!
Animal Hybrid 2
Two cute Maine Coon cats 8 and 9 months old

And this guy is an ostrich
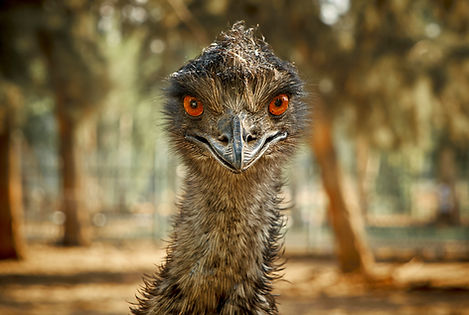

Here, a new animal has come into existence. I call this guy "cattrich" which is a combination of cat and ostrich.
Green Screen Task
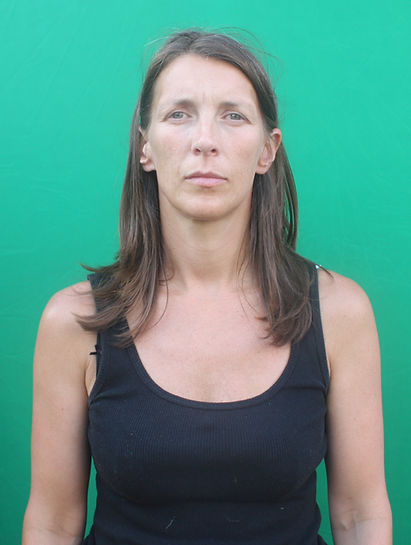

Bleed problem and Green Screen mistakes
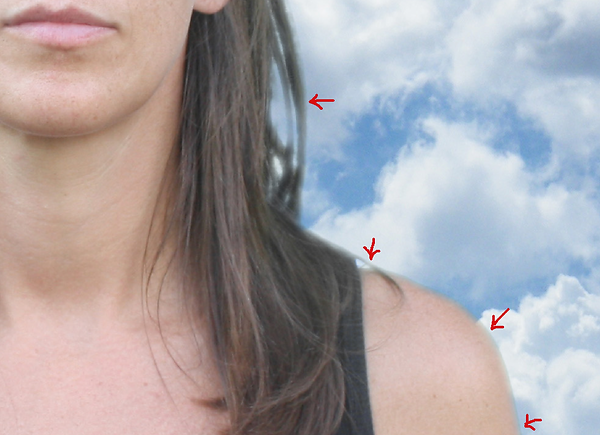
The problem with the above task was a bleed issue. That is why good chroma screen lighting is crucial and can definitely save time. A good chroma screen is the one which is lit evenly. Also, the distance between the person or subjects and the screen should be far away enough to prevent bleed. Bleed is when the colour of the chroma screen bleeds into the subject. Looking at the screengrab below, you can notice the green colour on the edges of the lady picture.

How I fixed the bleed problem
I refined the edges of the selection (mask) with Select -> Modify -> Feather & Reduction. Also, I used Colour Correction to desaturate the green and cyan colours in the mask. Below is the fixed version:
Task: Apocalyptic Building
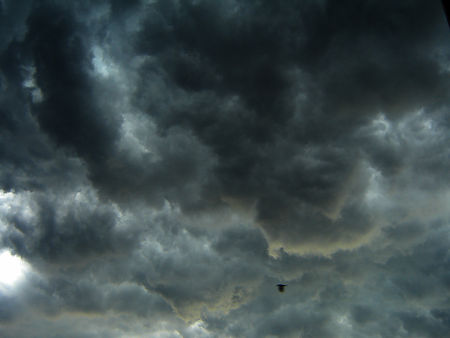
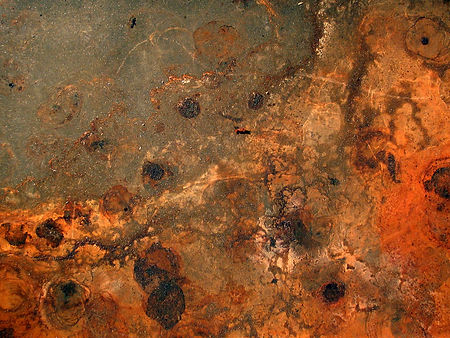
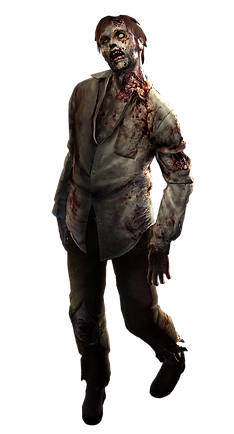
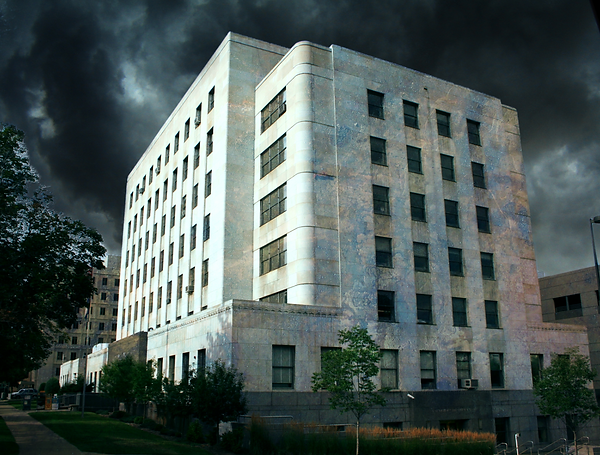
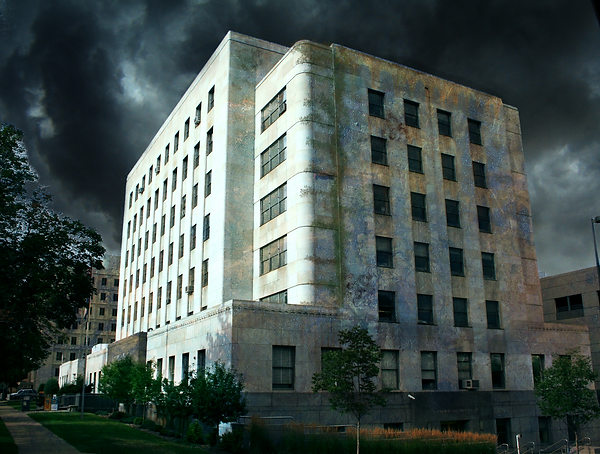
I used the supplied assets as well as the decals and png files I found on the internet to create an apocalyptic building.
Supplied assets:

The assets I found on the internet:


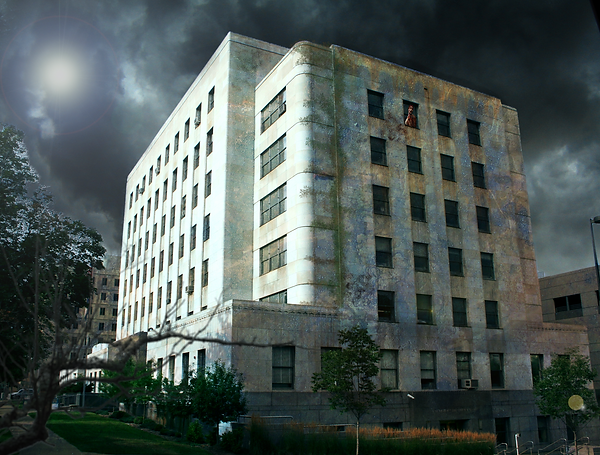
My final work:

Workflow:





Some techniques I used
-
Harmonising the building with the sky by way of using Colour Balance
-
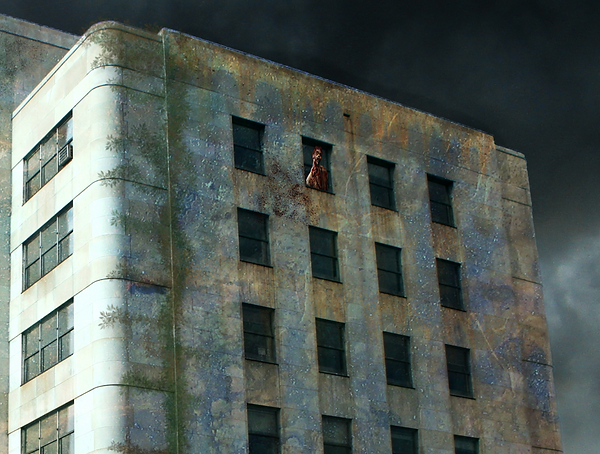
Using Blending Mode (overlay) for the rust image to dirty up the building
-
Drawing vines (foliage) on the building with importing a downloaded brush.
-
Lense flare + Blending Mode (Screen)
-
Lense blur to blur the branch in the foreground
-
Using Dodge and Burn tools on a new layer filled with 50% Graye (Blending Mode: Overlay)
Introduction to Maya
.png)
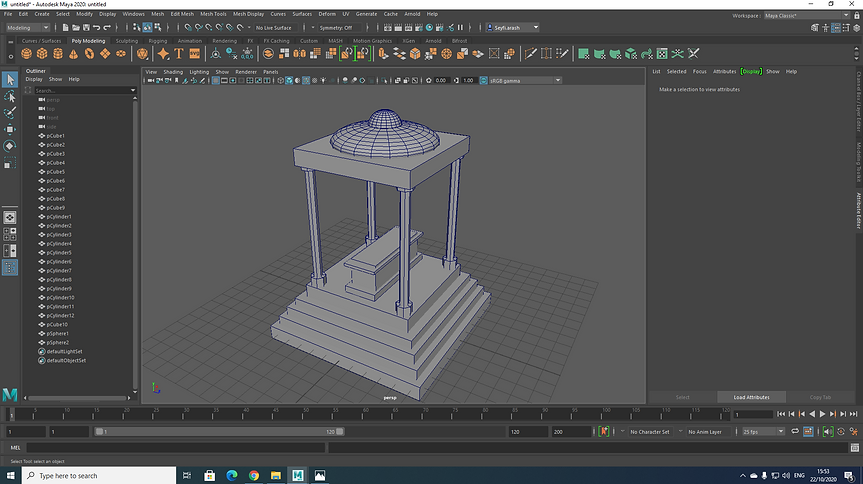
During the lecture, I built a simple temple using moving/rotating/scaling tools as well as very basic polygon shapes in Maya
After the lecture, I tried to make my model more attractive by applying new material (ceramic) to it and using Arnold SkyDome light. Then, I rendered it.
.png)
And my rendered model:

Task: Modeling a spaceship
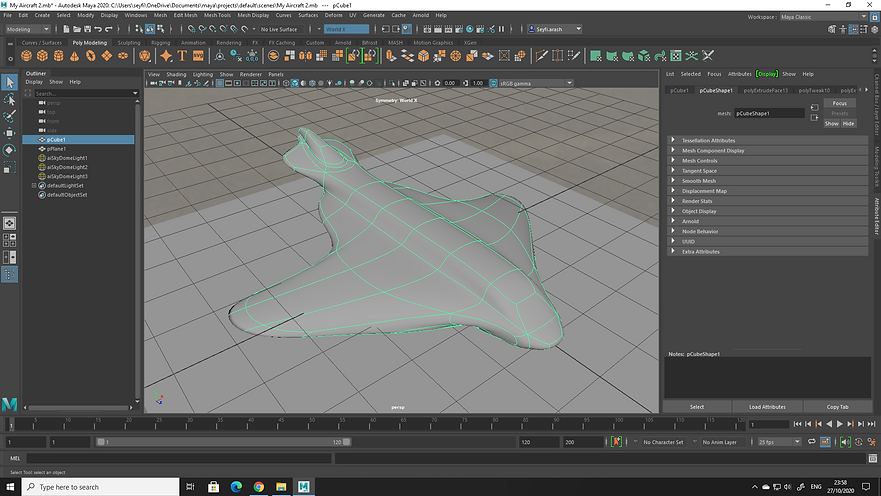
Here, I built a spaceship using basic extruding techniques:
My spaceship before smoothing:


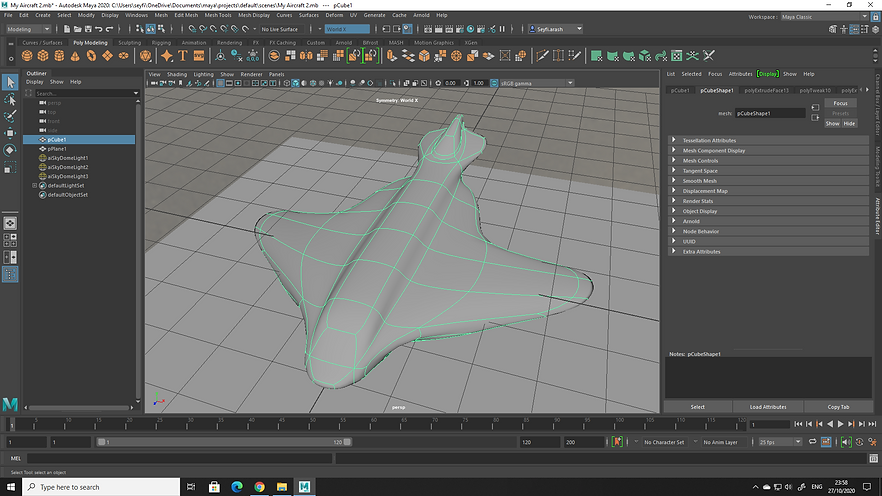
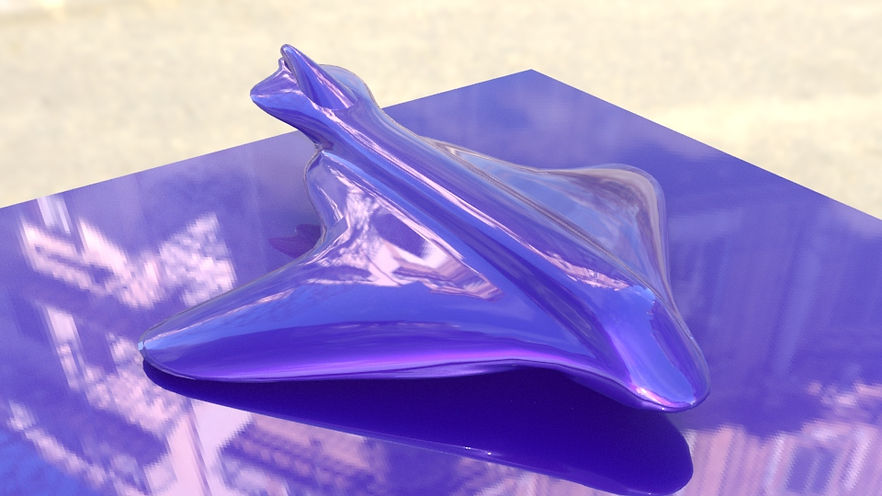
My smoothed Spaceship
There are a few smoothing techniques. I avoided Mesh->Smooth as it subdivides my model and makes it difficult to change it after smoothing. It is always better to model with low-poly and finally render it with high-poly. I only pressed the button 3 on the keyboard to activate smooth preview. Below is my smoothed model:
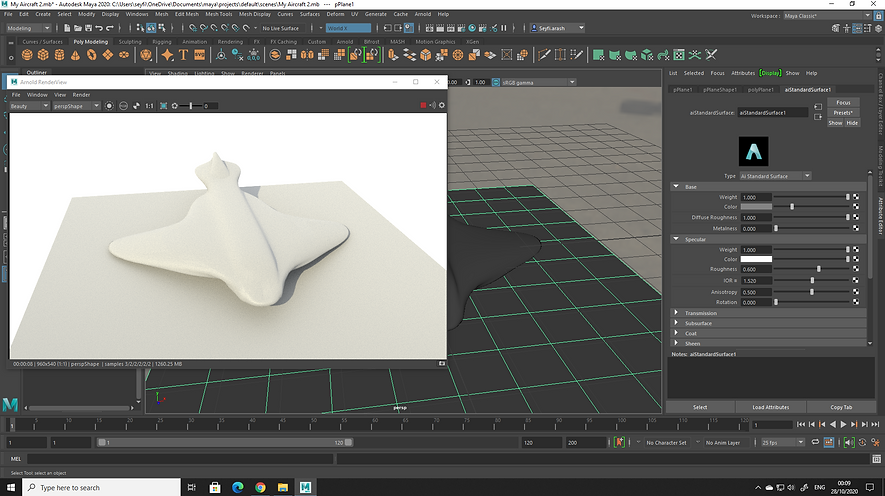
Rendering my model

Making a Coffee Cup
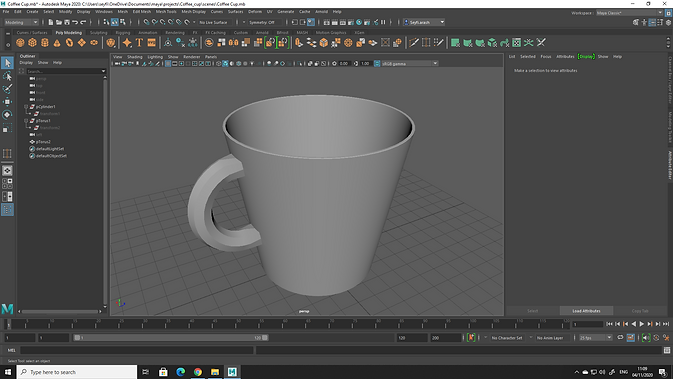
I have made a basic coffee cup using several techniques:
.png)
Workflow
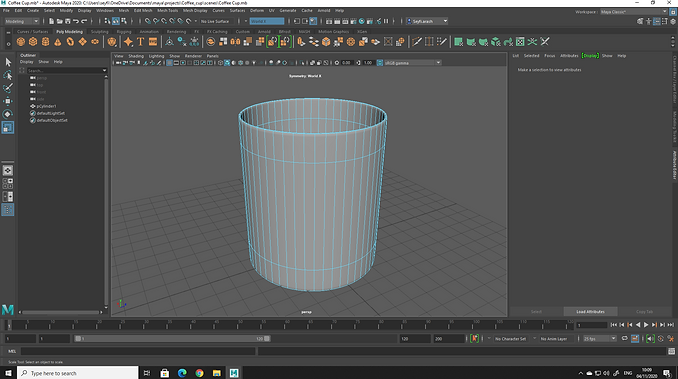.png)
I made a cylinder, then deleted the upper faces. To select the faces, I convert a selected vertex to faces by Ctrl + Rclick. It is the easiest way to select all the faces.
.png)
Used scale to make it more cup shape.
.png)
Created a polygonal torus and moved it to the position of the handle.
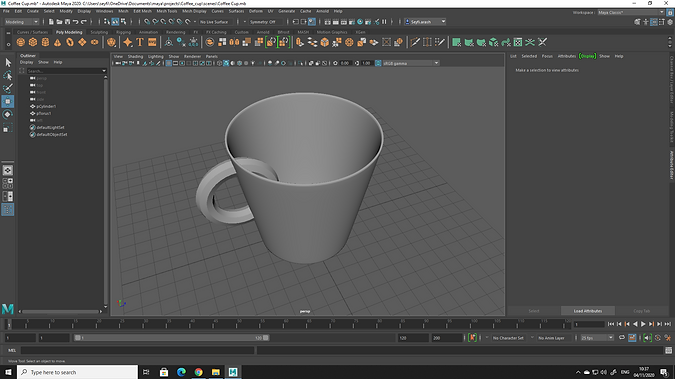.png)
Tried to place it where it should be.
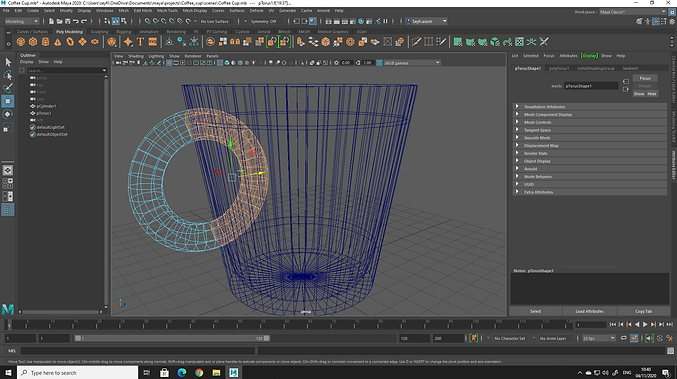.png)
Accurately chose the inner part of the torus to delete it.
.png)
Deleted the inner part.
.png)
Mesh Tools -> Insert Edge Loop. I need to insert them in order to connect the vertices of the handle and cup together afterwards.
.png)
Used Mesh -> Combine as well as Target Weld to connect the handle with the cup.
.png)
This is the outcome. I also used Bevel Edge to add more edges for the smoothing process.
Making three wine glasses
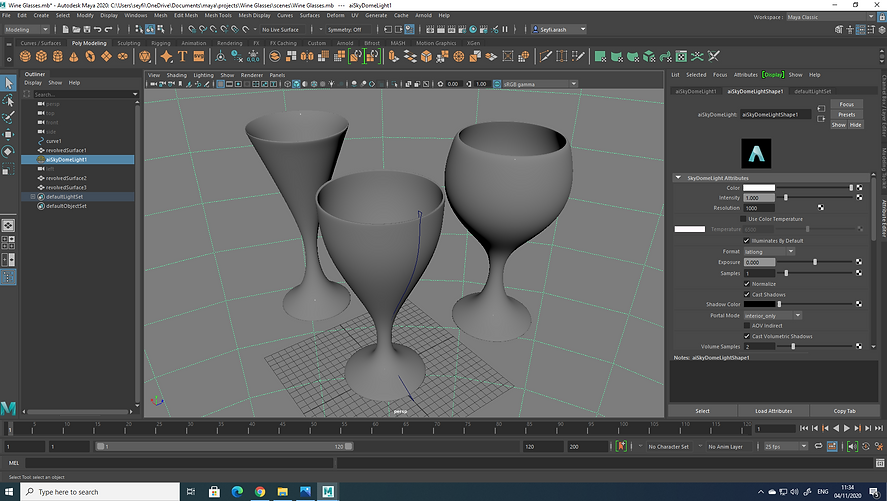
I modelled three different wine glasses using the same techniques for all:
.png)
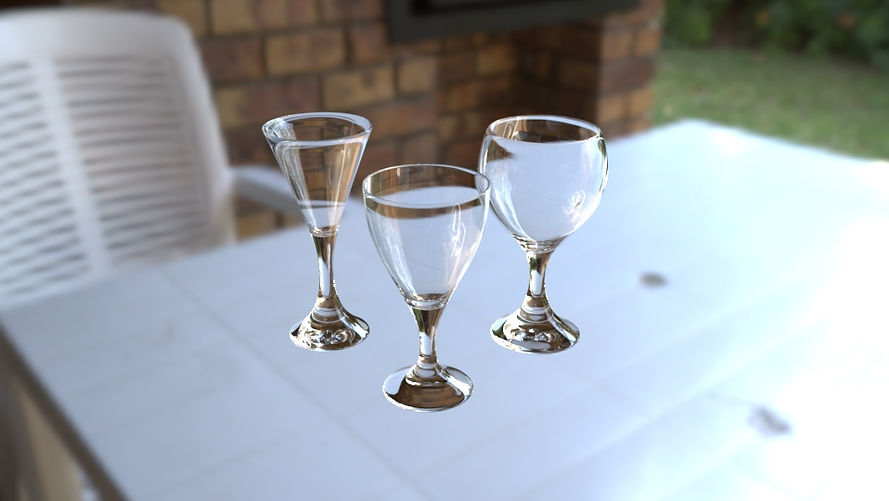
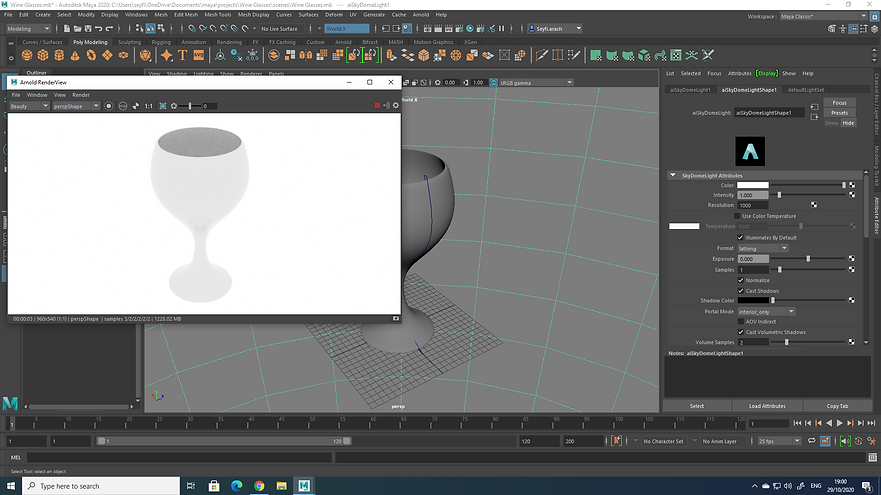
My rendered wine glass
.png)
Workflow
.png)
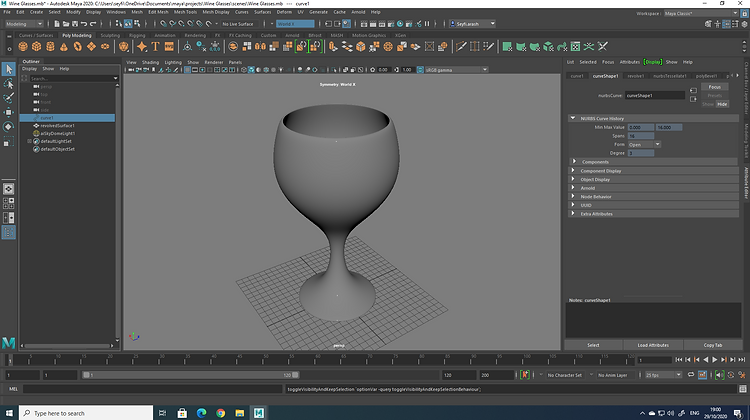
I started with Curve Tools -> CV Curve Tool and drew a very simple pattern for my first glass.
.png)
Then used Surfaces -> Revolve. Note: I first reset the Revolve tool to start from a good point. I did it by going to Edit -> Reset Settings in the Revolve window itself. Most importantly, then I set these settings in the Revolve window: Polygons, Quads, General.
.png)
To smooth the glass better, I added edges by Bevel Edge.
.png)
Duplicated my first model and changed the CV curve by Rclick -> Control Vertex.
Modelling a kettle
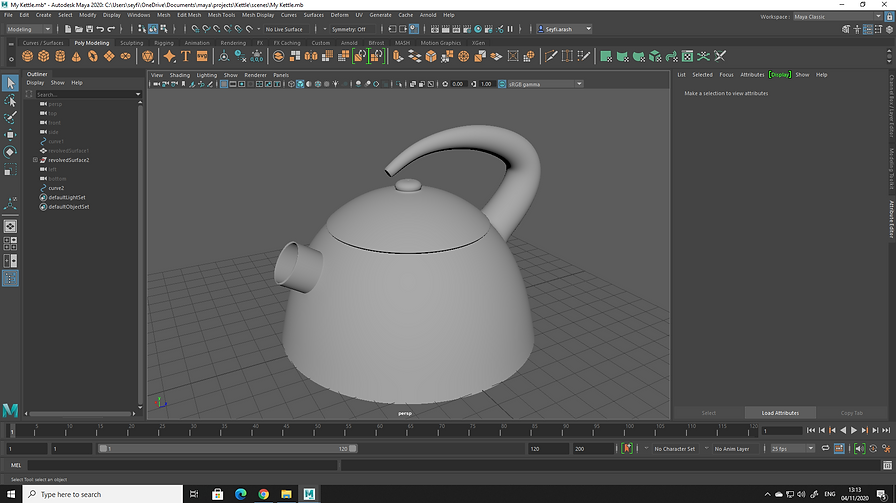
I have made a kettle using some new techniques. Below is the outcome:
.png)
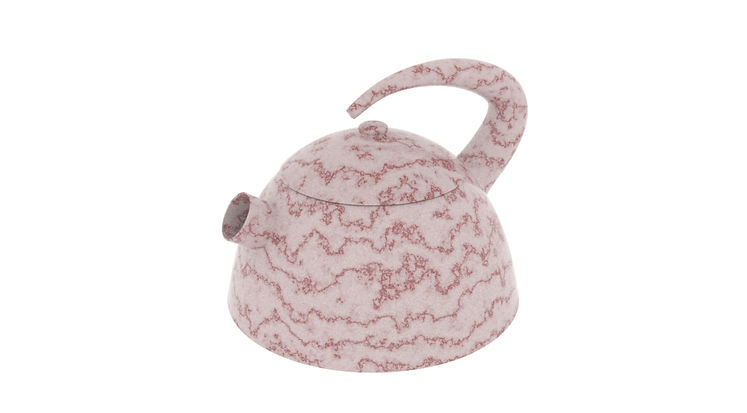
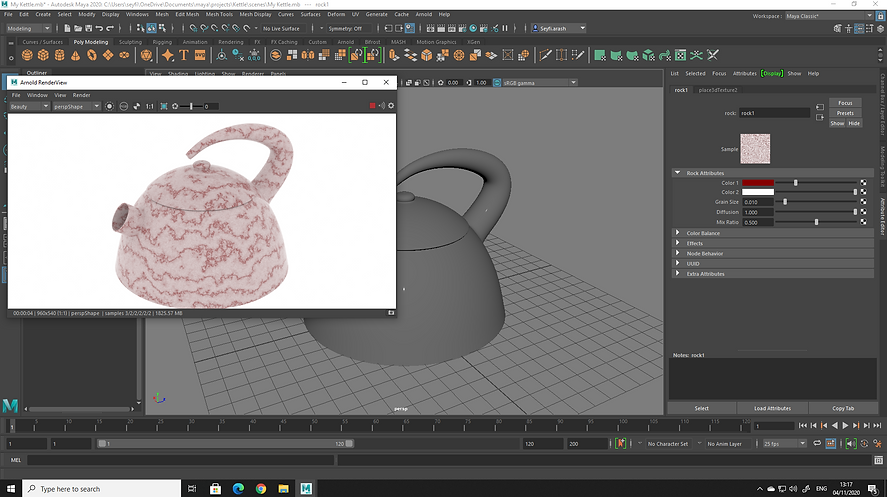
My rendered kettle
.png)
Workflow
.png)
I used the CV Curve and the Revolve technique.
.png)
Chose a number of faces and then used Circularize.
.png)
Drew a CV curve in side view
.png)
.png)
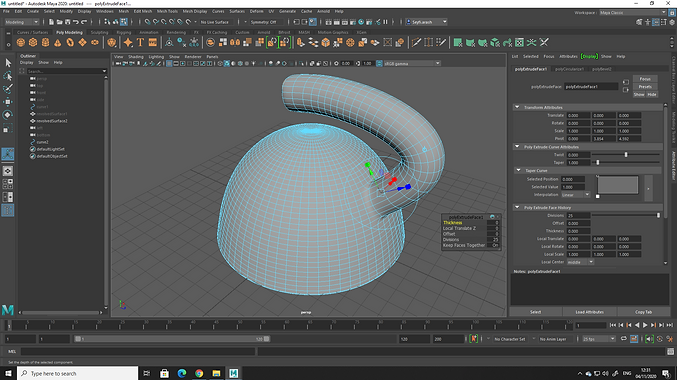
Extruded the selected faces along the CV Curve to create the handle. Note: I changed 'U Number' and 'V Number' in Advanced Tesselation Options -> General Tesselation Options to add subdivisions to the extrusion.
.png)
.png)
Changed Taper option in Poly Extrude Curve Attributes to make the handle tapered.
.png)
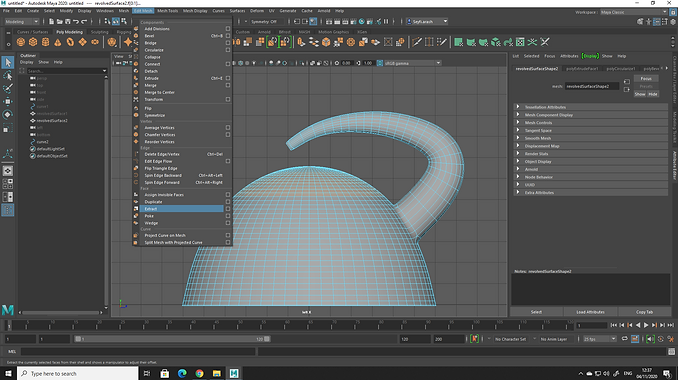
Used Extract to separate the lid from the kettle
.png)
.png)
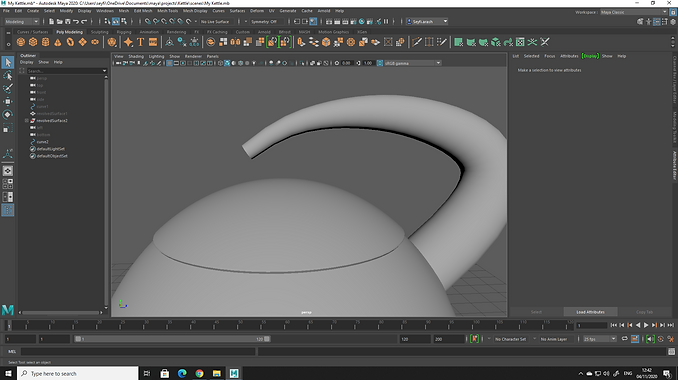
Extruded the lid and used Bevel for when smoothing.
.png)
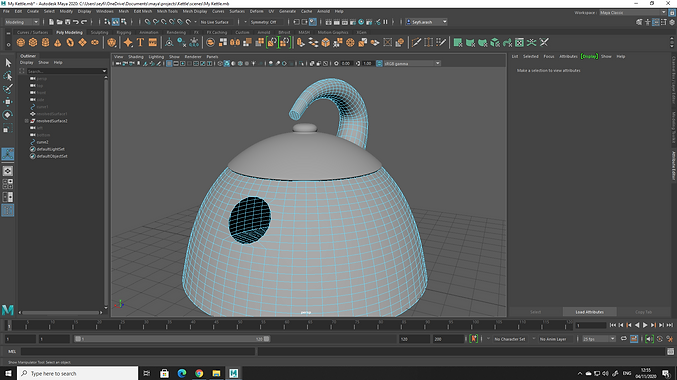
Made a handle for the lid using extruding techniques
.png)
Selected some faces, used Circularize and then deleted them
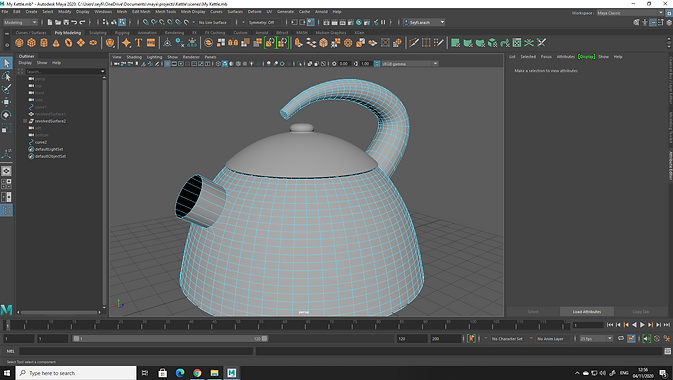.png)
Extruded the edges of the deleted part.
.png)
Extruded the edges of the spout to the inside of the kettle as well.
.png)
Final work, ready for rendering.
Lecture 6: Lights and the AIStandardSurface
Arnold is a very optimised and efficient renderer embedded into Maya. Lecture 6 enabled us to gain an understanding of a few useful Lights in Arnold renderer. We also looked at ALStandardSurface which is a very efficient tool whereby we can mimic almost every surface in the real world. As for lights, we looked at 3 important Arnold lights, namely Skydome Light, Physical Sky and Area Light. Skydome light and Physical Sky are excellent options for exterior environments, and the latter is optimised for interior lighting.
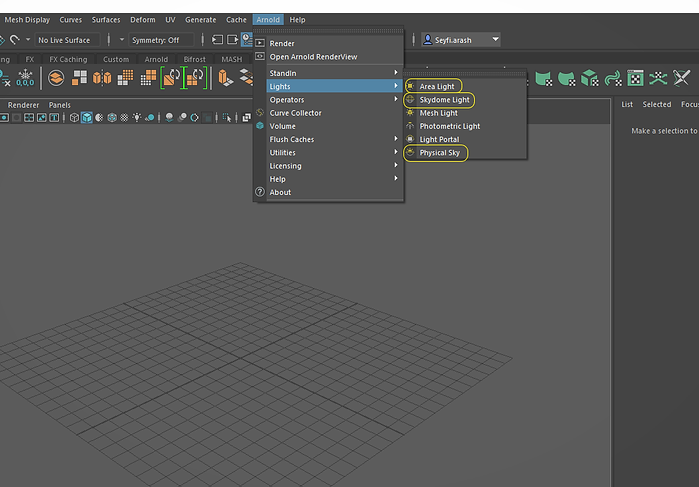
To assign a material to our objects, we use aiStandardSurface, which is provided by Arnold renderer. We learnt how to change the most important aiStandardSurface settings in Attribute Editor to create a needed material and apply it to our objects. Below picture shows the settings we looked at during lecture 6:
.png)
Assigning new materials to my previous models
Practising the techniques I learned from lecture 6, I have applied new materials to my models:
A new cup by creating a new material and using two Area Lights in the scene:
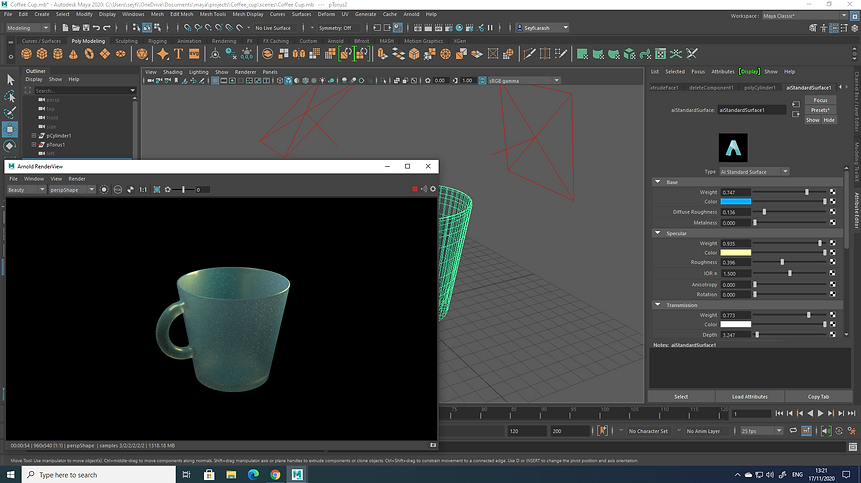.png)

And a new kettle by making a new material and using Physical Sky:
.png)
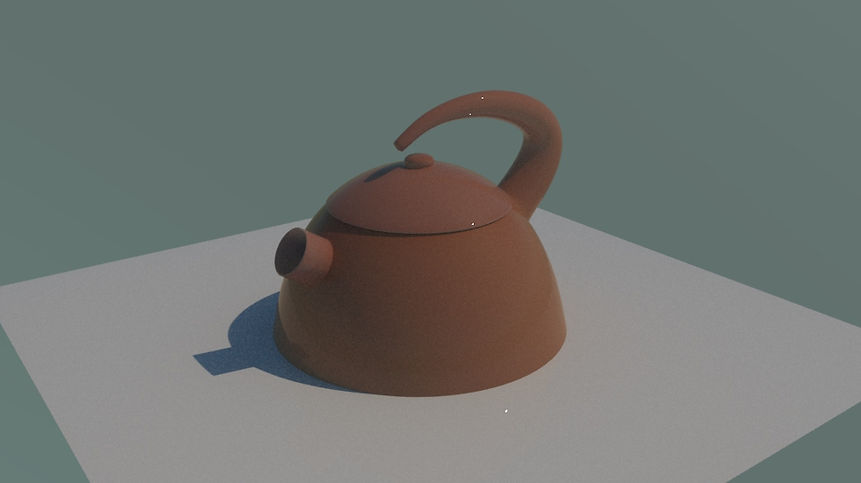
Lecture 7: Maps, Shaders and Render Setup
In lecture 7, we learnt how to use shaders and add maps. Also, we got a feel for a few important render settings in Arnold.
Hypershade
Hypershade is a window where we can build and control shading networks by manipulating rendering nodes. To open Hypershade, we go to Window > Rendering Editors > Hypershade. Below is a photo from its working area:
.png)
Adding maps
We can simply add maps to every attribute in aiStandarsSurface settings. To do that, we need to click on the chequered box in Attribute Editor when setting up aiStandardSurface or through Hypershade window.
Note: Colour attributes accept three channels (RGB), while others accept one number (Alpha Channel: 0 - 1).
Look at the below photo and notice how colour maps go to colour attributes and alpha maps connect to non-colour ones.
.png)
2D texture placement attributes
There are some important settings when adding a 2d map like a ramp. Repeat UV is one of them.
.png)
An example: the difference between Opacity and Transmission
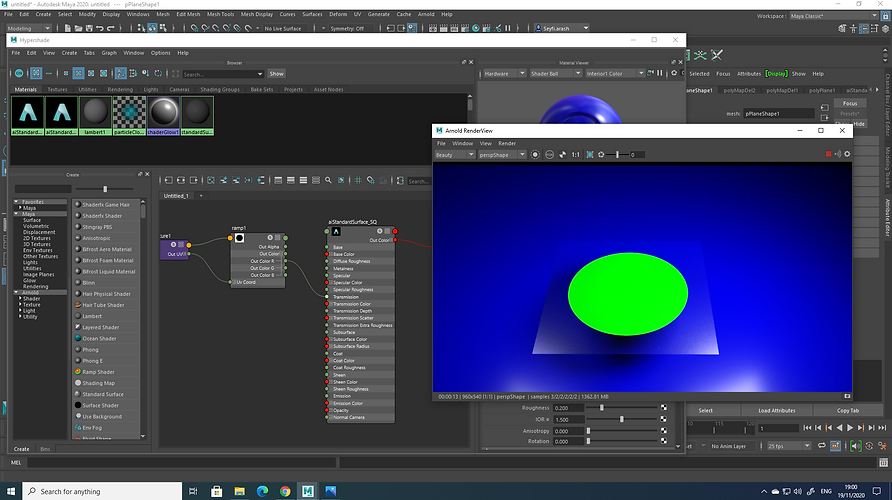
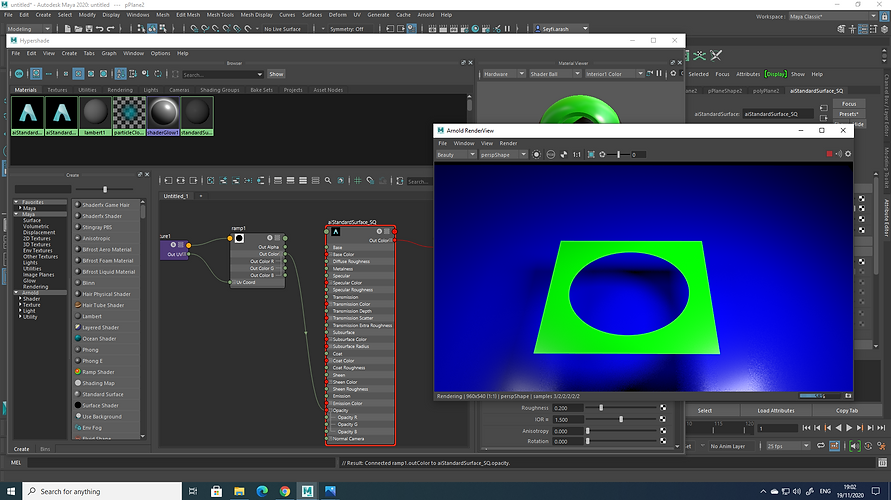
We made the below ramp then connected it to both Opacity and Transmission attributes to see the difference between their behaviour.
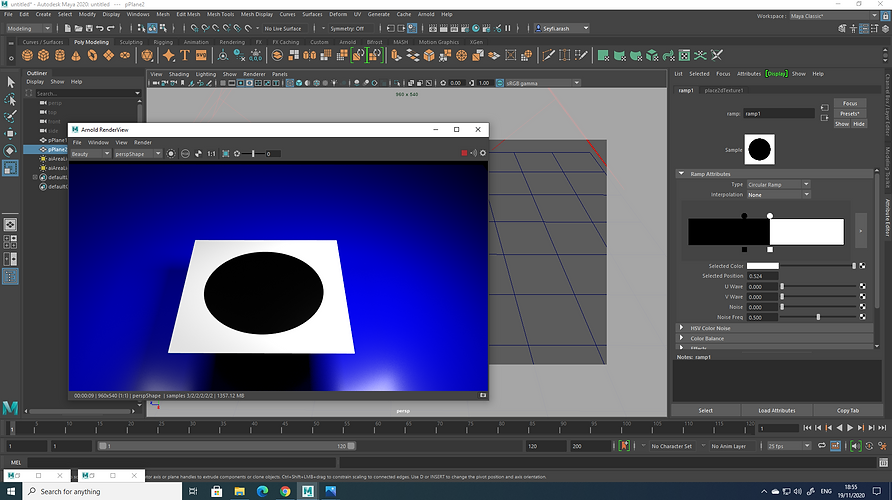
As you can see below, in Transmission, the white part of the ramp (Amount: 1) represents transparency.
Yet, in Opacity, the white part of the ramp (Amount: 1) acts as the solid part of the object, in contrast to Transmission behaviour.
Render setup: Sampling settings
To remove noise when rendering images, we can play around with Sampling settings. Sampling settings can control the sampling quality of the rendered objects. If we increase the sampling rates, it will reduce the amount of noise in the images, but will increase rendering time at the same time. So be wary of that!
.png)
Fake News Assignment
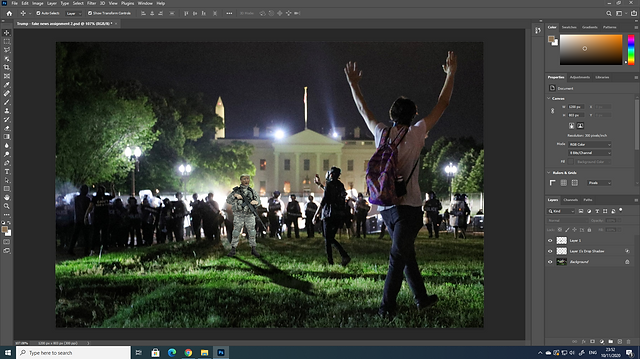
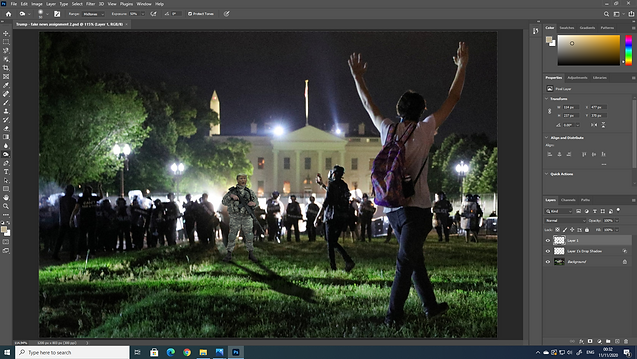
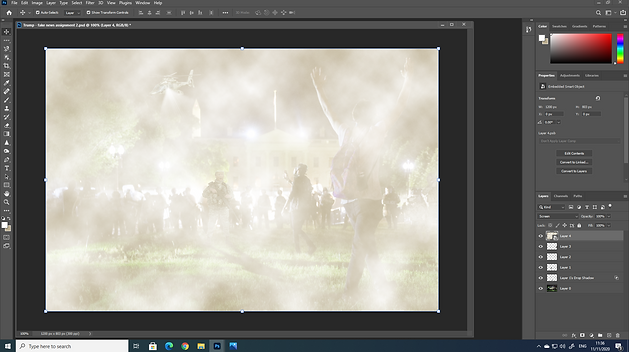
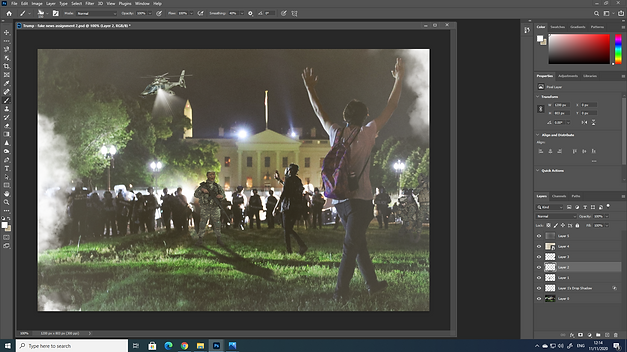
The aim of this assignment is to make a digital montage and explore photographic manipulation in Photoshop. I used some useful compositing techniques to create a visual narrative for my fake news.
Fake News: My final work

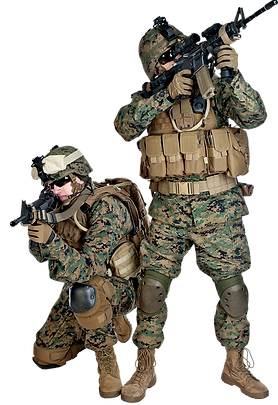
Assets I used




Workflow
.png)
.png)
.png)
.png)
.png)
.png)
.png)
.png)
.png)
.png)
.png)
Bond Gadget Assignment
For Bond Gadget, we create a 3D object modelled in a realistic manner. The object should be based on a real object, but it needs to be creatively transformed to be James Bond gadget.
My Bond gadget: A radio transceiver watch: Walkie-talkie watch

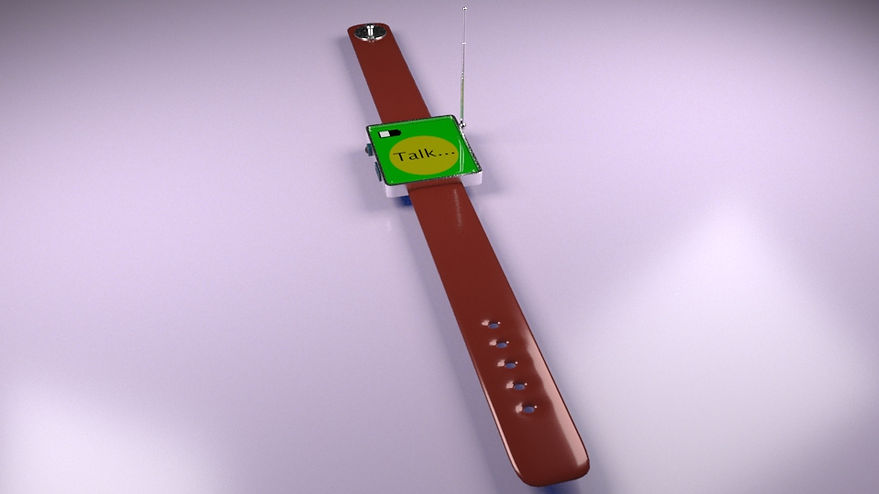

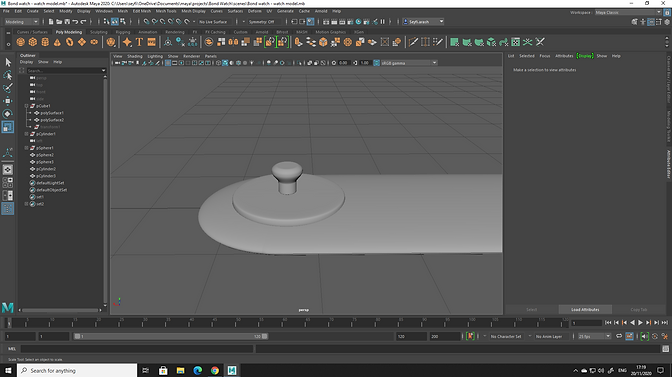
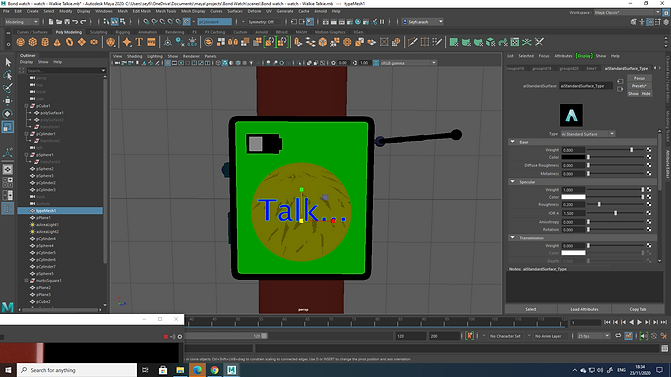
Workflow
.png)
.png)
.png)
.png)
.png)
.png)
.png)
.png)
.png)
Lecture 9: UVs
In this lecture, we looked at UVs. We got the hang of UV Editor, UV Toolkit, and overall logic of UVs, as an important and useful tool in 3D modelling and texturing. Basically, UV lays out the objects flat. We can see the flattened out objects in UV Editor window. Note: The texture will apply to 0-1 space of the UV Editor.
When modelling different and complicated objects, UVs become distorted. It is important to avoid distortion or at least minimise it when it comes to texturing.
Texel Density is also another important thing to bear in mind, meaning how many pixels are going to be in the image face. We need to keep Texel Density even all over our objects and faces. Therefore, we should follow a workflow for when we deal with distortion and uneven Texel Density.
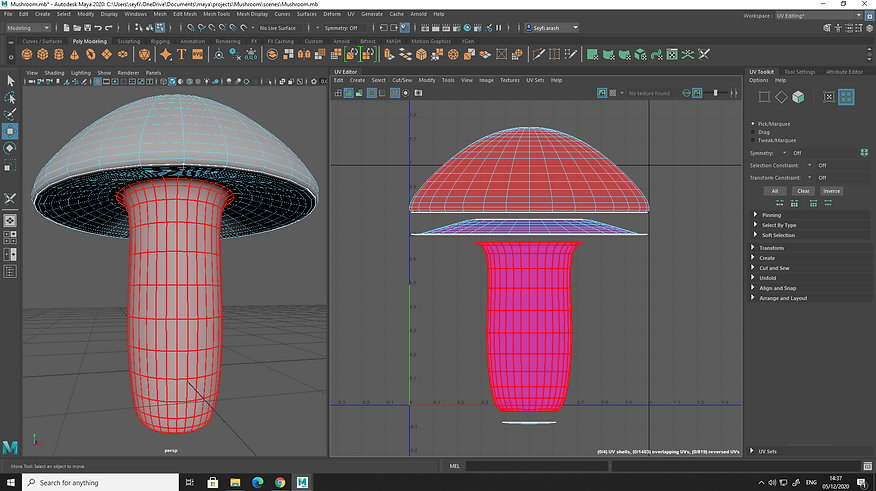
To practise UV mapping, I modelled a basic mushroom to start with it.
.png)
UV mapping projections
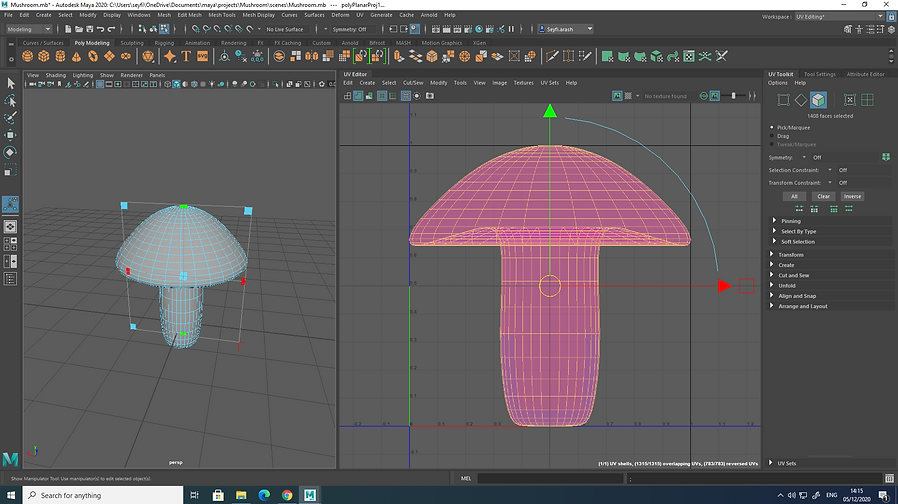
When UVs are wrong and distorted, we can make UV mapping projection to project from different views. Below image shows all types of projection we can do, under UV menu:
.png)
I chose Planar, then projected from Z-axis.
.png)
.png)
Now I need to break the UVs into the shells to work on every piece of it. Important: Under the UV menu, select 3D Cut and Sew UV Tool, it enables us to select edges and cut the object into pieces. After cutting, I can select a shell by pressing W and R-click on a shell in UV Editor.
.png)
Now I am ready to lay them out flat. In UV Toolkit, I pressed Unfold and then Straighten Shell. Then, I used Smooth under Tools menu in UV Editor. The smooth tool works with two handles: Unfold and Relax. I played around with both to unfold it better. I also used Straighten UVs as well. Note: This workflow can be repeated for each of the shells.
.png)
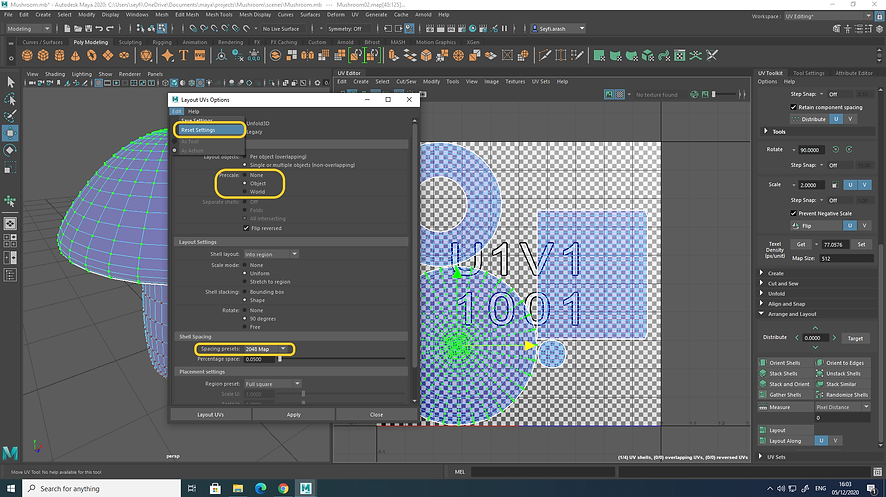
To put everything into 0-1 space, I selected all shells and press Shift + Layout button in UV Toolkit. Then, I pressed reset option under the Edit menu in the dialogue box, set Spacing Preset to 2048, and changed Prescale to Object.
.png)
Then I used Texel Density settings under Transform menu in UV Toolkit to make all shells even.
.png)
Now I have all UVs laid out properly, as you can see above.
Lecture 10: PBR shading networks, introduction to Megascans Bridge and Mixer
In lecture 10, we learn techniques and workflows of creating a PBR shading network for a brick wall. We also gained an understanding of how to create PBR shaders using Megascans Bridge and Mixer software. We create shading networks to mimic real words.
Different PBR Maps
-
Albedo: Raw colour of the object, like base colour.
-
Bump: Adds more details. In Bump shader, white is more bumpy, and Black is less bumpy.
-
Displacement: Uses only the red channel, but is not red. We move the mesh using this map. Displacement maps are .exr files, and they can hold a lot of information.
-
Normal: this map is like Bump shader, gives an illusion of depth to the surface. This map basically shows the direction of every surface.
-
Roughness: shows how sharp or soft the reflections are.
-
Specular: Shows how reflective are the surfaces, using a grayscale map.
Applying maps to the relevant places on the material
-
Put all the maps into Sourceimages folder inside my project folder.
-
Place2dTexture: Go to these settings to change Repeat UVs (when the texture is too big) and translate frame options.
-
After setting up Place2dTexture for Albedo map: in Hypershade, select the Albedo map and go to Edit-> Duplicate -> With connections to Network. This helps us to duplicate the Albedo and make other shaders.
-
Note: Colour Space: For colour images: sRGB / For 0-1 maps & grayscale images: Raw
-
Note: After adding the specular, roughness map, bump and displacement map, turn on "Alpha is luminance" under colour balance in file node (in Hypershade, when importing the file and setting colour space).
-
Connect roughness to Specular Roughness
-
Add bump map to fake depth (like drop shadowing) on the surface—White: more deep, black: less deep. After importing the bump map, go to the shader and find Bump mapping under Geometry. This will create a node for us to connect our bump map to it.
-
Note: Bump map does not lift the surface. The surface still will be flat after adding bump shader.
-
Make aINormalMap to connect the normal map to it. Then connect it to Normal Camera (like Bump).
-
Note: Normal map is more realistic than the Bump map.
-
Add displacement map: displace a physical mesh using the map.
-
Note: Displacement map should be connected to Shading Group (the last node in the shading network), not the material node. In between the shading group and displacement map, we need a DisplacementShader node.
-
Subdivide at render time: go to Subdivisions under Shape tab in Attribute Editor. Set up type and iterations.
-
Change Displacement attributes under the Shape tab: Hight, Bounds Padding, Scaler Zero Value. Set Scaler Zero Value to 0.5.
-
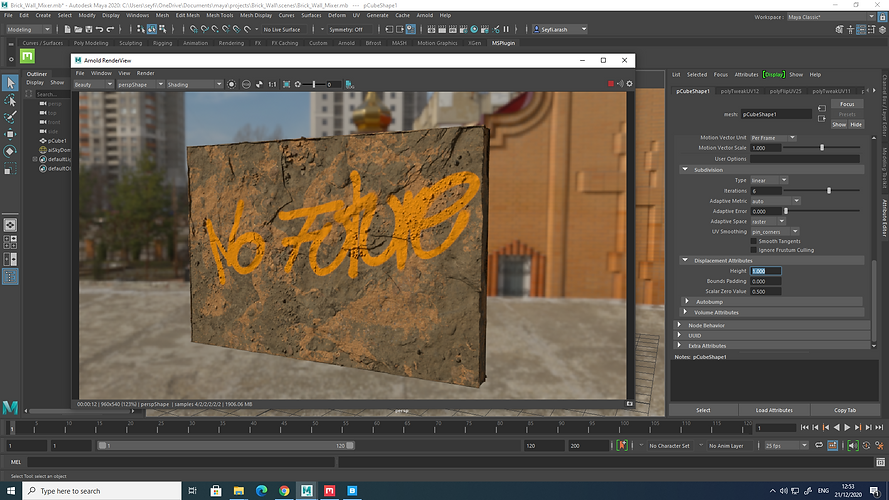
Add Graffiti by pressing Tab and typing layeredTexture in Hypershade; then it creates the node. Put layered texture node in between the Albedo node and material. Add a graffiti texture to Alpha in layeredTexture node.
-
Note: Turn on Alpha Is Luminance in the colour balance section under file node when importing graffiti (not under layeredTexture node).
.png)
.png)
.png)
Creating PBR shaders using Megascans Bridge and Mixer software
1. Bridge
The first thing we should set up is the export settings: Edit -> Export Settings set Export Target to Maya and click on Instal Plugin.
.png)
Note: Bridge works with Maya StandardSurface, not aIStandardSurface. They are almost identical, though.
First, we need to select the model inside Maya. Then we go to Bridge and export the material we like. It automatically applies the material to the object selected. After applying the material, we may need to set up the placement settings (Place2dTexture). We also might need to change Subdivisions and Displacement Attributes after applying a material by Bridge. The great thing about using Bridge is that we do not need to make shading network ourselves, the software makes it into StandarSurface, instead of aIStandardSurface.
2. Mixer
We can mix different materials by Mixer software.
.png)
We can change lighting settings under the Display menu located on the right-hand side of the UI. We may set the Background to Skybox to mimic Arnold Skydome.
To add a mask, right-click on a layer and choose Add Mask Stack. For instance, we can add noise by creating a noise mask. We also can add a map as a mask and use a library asset. To move the mask itself, we need to add a projection and play around with Offset X, Offset Y and Rotate. We can add Brightness/Contrast and other modifiers as well.
To export to Maya, first go to File -> Export to Library. Then, we can access the mix in Bridge. As before, after exporting to Maya, we may need to change 2dTexture Placement Attributes (Translate Frames & Repeat UVs) and Arnold Subdivisions and Displacement Attributes.
.png)
Above picture shows the texture I created in Mixer and brough into Maya.
Lecture 11: Introduction to Substance Painter
In this week, we looked at Substance Painter. We modelled an oil drum and painted it in Substance Painter. In order to prepare the model in Maya for Substance Painter, we need to assign different materials to different parts of the model. Substance Painter only looks at materials, shaders and textures, not the objects. Therefore, to be able to paint all parts of an object in the software, we have to separate them by applying distinct materials to them in Maya. I put Lambert material on all parts of the oil drum and named them.
.png)
To export the model, we select all parts of it and go to File -> Export Selection. We need to set the file type to FBX. Then, go to Substance Painter and create a new file. Set Resolution to 2048 and uncheck Auto-Unwrap and Import Cameras as we do not need them now. Select the FBX file that was exported from Maya.
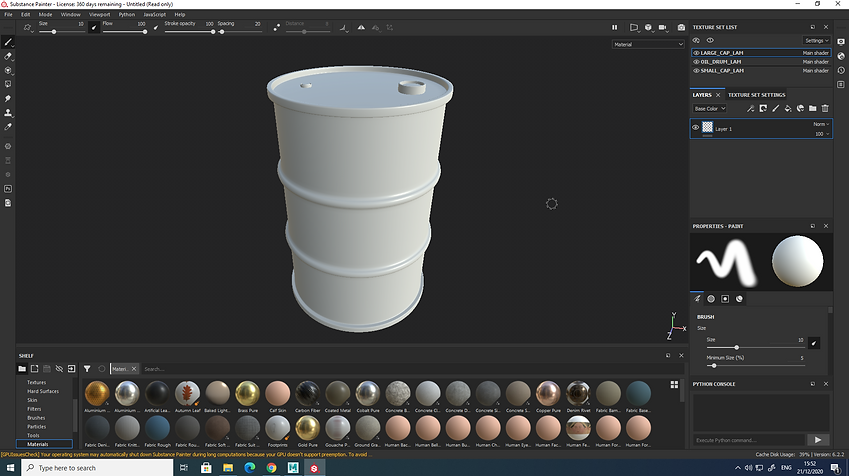.png)
The first thing after importing the model is to go to Edit -> Bake Mesh Maps. I set the output size to 2048. We need to turn off Normal and Thickness. We may need Thickness when our models need Subsurface Scattering. In this case, we do not need that.
.png)
Some important shortcuts:
-
Ctrl + Rclick + Left or Right : Brush Size
-
Ctrl + Rclick + Up or Down : Brush Hardness
-
Ctrl + Lclick + Left or Right : Brush Flow
-
Ctrl + Rclick + Up or Down : Brush Rotation
-
R click : brings up brush controls
-
Alt + click on a mask: show the mask
Note: Added a fill layer but want to get rid of seams and the edges of the UVs? Set Projection to "Tri-planar projection" under PROPERTIES -FILL.
To export, go to File -> Export Textures. Change File Type to "Based on output template". Change the Height file-type from png to EXR. Choose aIStandardSurface for Output Template. I export the textures to Sourimages folder in my Maya Project folders.
.png)
.png)
Lecture 12: 14/01/2021
MODELLING TIPS AND TRICKS
During this week we looked at some tips and tricks helping us with our next assignments.
Extrude along a curve on a surface
We can draw a curve on a surface of an object, by first making the object live, and then go to Create -> Curve Tools -> CV Curve Tool. To make an object live, we should find the relevant button next to snap icons, as the following screengrab demonstrates:
.png)
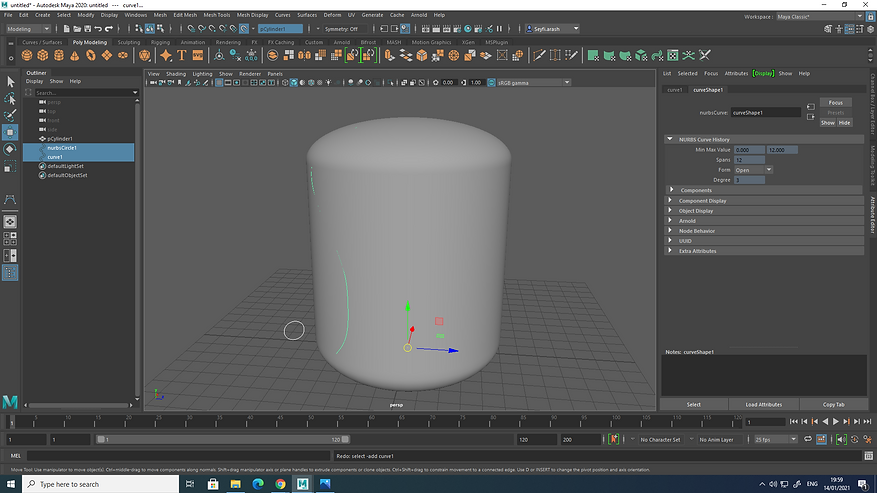
I created a circle and drew a CV curve on the live object I had already modelled. Below is what I did:
.png)
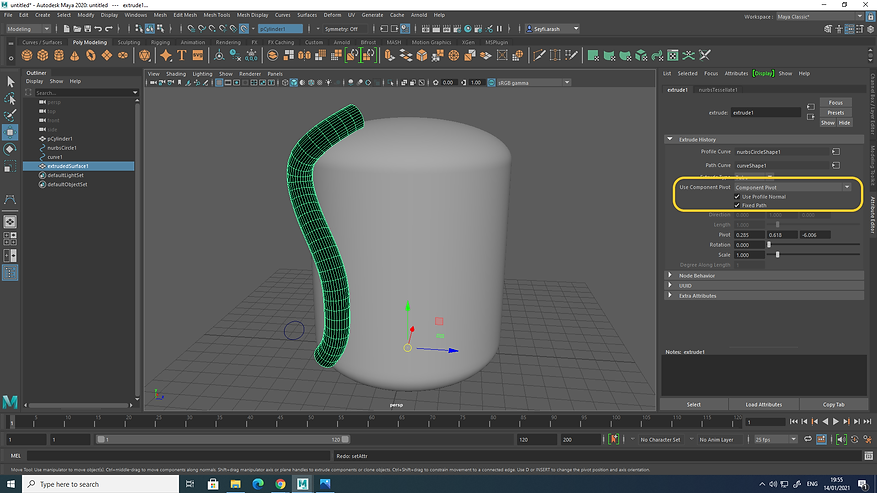
Then I selected both the circle and the curve and went to Surfaces -> Extrude to extrude the circle along the curve on the live object. I set Use Component Pivot to Component Pivot and checked the boxes of Use Profile Normal and Fixed Path.
.png)
As the above screengrab shows, the extruded circle is black, and it means I need to reverse the direction of the object's surfaces. To do this, I went to Mesh Display -> Reverse.
.png)
Therefore, below shows the result:
.png)
Nonlinear Deformers
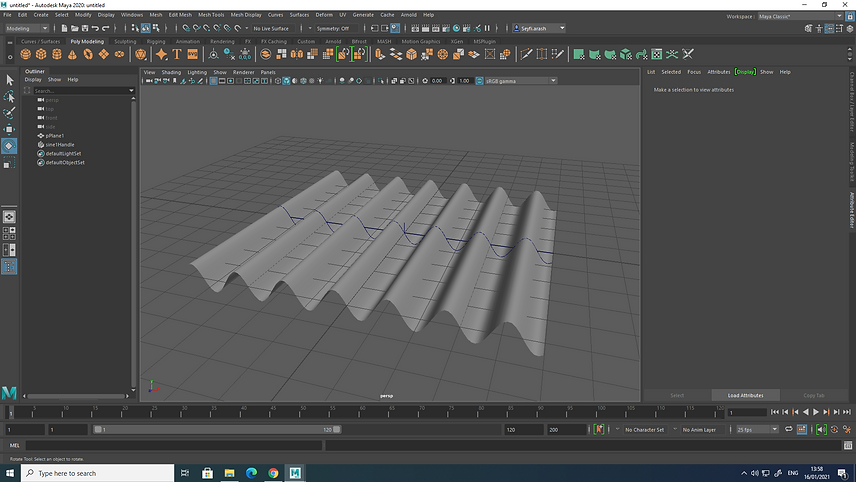
There are several options under the Deform menu, but most importantly, there are very useful nonlinear deformers, namely Bend, Flare, Sine, Squash, Twist, Wave.
Below are some models I made with each of them:
Bend:
.png)
.png)
Flare:
.png)
.png)
Sine:
.png)
Squash:
.png)
Twist:
.png)
Wave:
.png)
Assignment 2: New York Rooftop & Time Leap
New York Rooftop
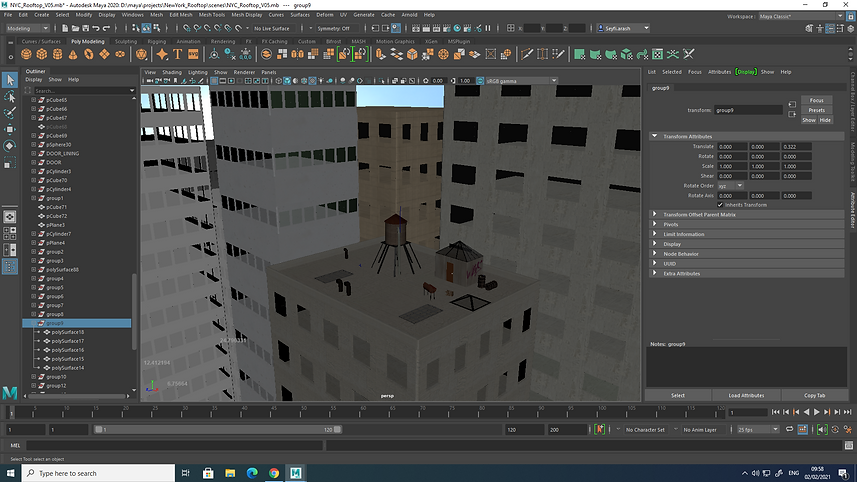
For assignment 2, I built a rooftop of New York City in Maya. The environment and all the objects are textured by Bridge, Mixer as well as Substance Painter.
.png)
.png)
Final Renders


Wireframe Renders


Time Leap
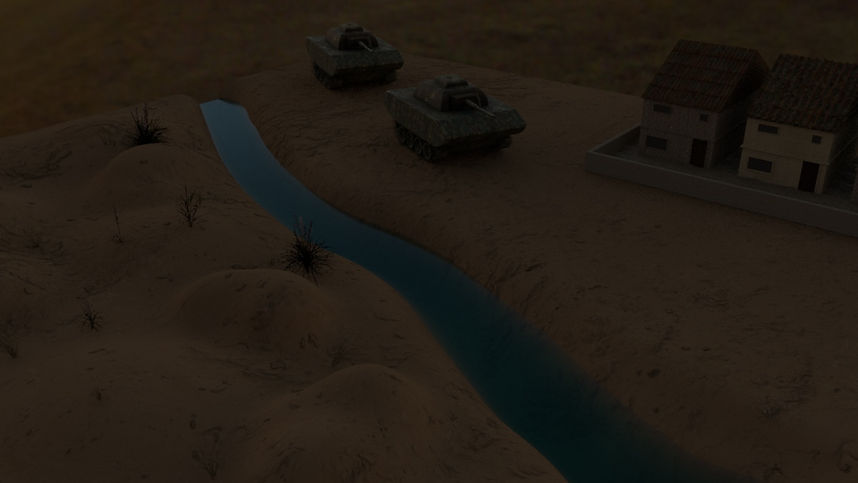
I have chosen a period of history and modelled and textured an environment to tell a narrative. I used all the texturing software we learnt along with new techniques to focus on realism.
.png)
.png)
.png)
Final Renders

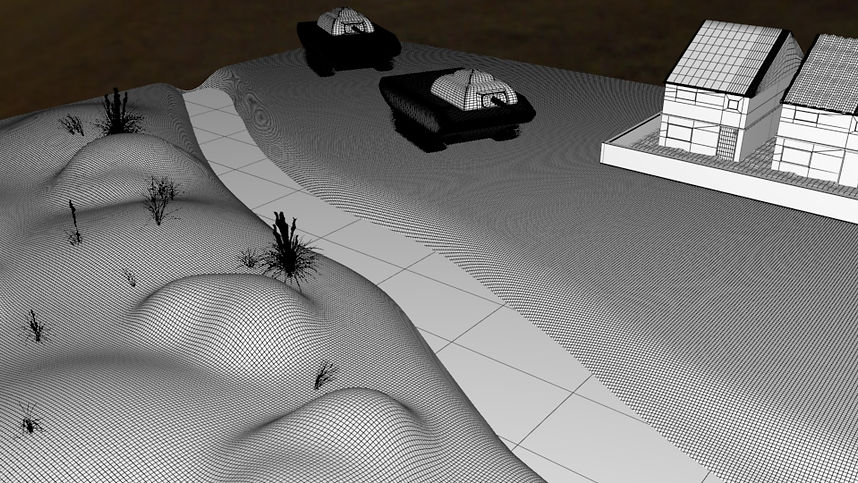
Wireframe Renders
