Human Skull Anatomy


These are illustrations of the human skull anatomy, with names of each bone. I have drawn coloured lines to point out each part distinctly.
Sculpting in ZBrush

This is my very first attempt to sculpting in ZBrush - My first monster!
Nose Excercise - Anatomy

Lecture two was on the anatomy of the nose and techniques of sculpting it. Above is my task, which is done during the online class.
Sculpting the nose
In lecture 2, we learnt about the anatomy of the nose and the techniques of the sculpting of the nose.
I addition to topology, we got an understanding of Dynamesh, Sculptirs Pro, ZRemesher and Morph Target.
Sculpting from refrence
Joaquin Phoenix
My first nose reference is this man- Joaquin Phoenix
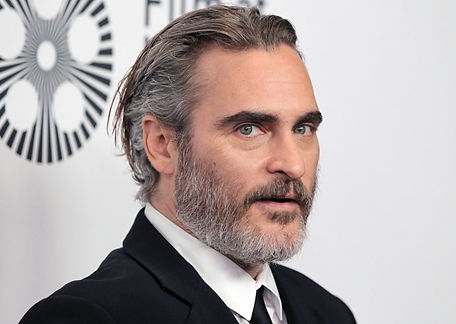

Following are the screengrabs of what I did:
.png)
.png)
To understand the workflow, have a look at the below film:
Juliette Binoche
I used the below photographs of this great actress as my refrences:


And here is the sculpting of her nose:
.png)
.png)
And the screen recording to grasp the sculpting process:
Mouth excercise - Anatomy

In week 3, we learnt the mouth anatomy as well as the techniques of the sculpting of the mouth. We also got a feel for how Masks work and can be very beneficial when sculpting.
Sculpting the mouth
My first mouth
I sculpted my first mouth in the class:


And this is how I did that:
My second mouth


Sculpting a mouth from reference
Natalie Portman
I tried to sculpt Natalie Portman's mouth. My reference pictures are as follows:


And my sculpting:


Check out my workflow:
Marlon Brando
My reference photos:


My sculpting:


The workflow:
Ear
In week 4, we got a feel for the ear anatomy as well as the techniques of the sculpting of the ear. We also understood how to add a tool to the scene using Append. To see all tools in the scene and select them, we should go to the Subtool window.
Ear Anatomy
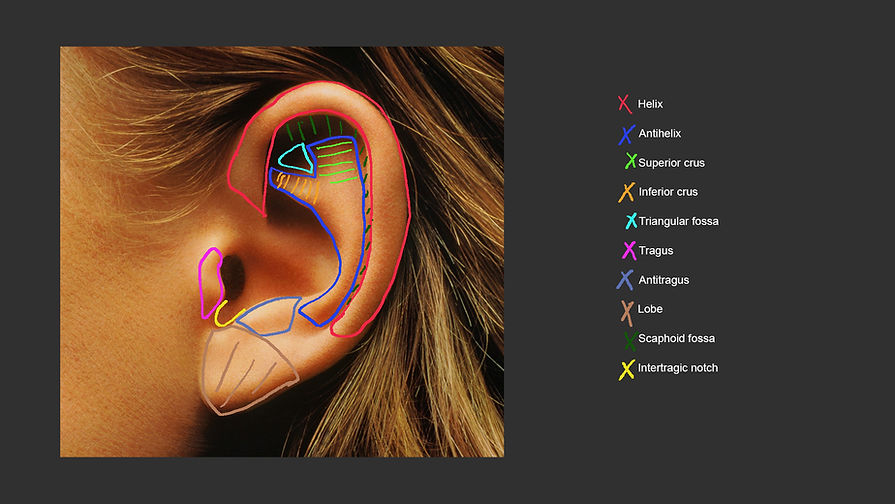
Sculpting the ear - from reference
Chris Rea
I picked Chris Rea to be my first reference for sculpting an ear


My sculpting:
.png)
.png)
And how I did it:
Penelope Cruz
My reference pictures for sculpting the ear of Penelope Cruz:
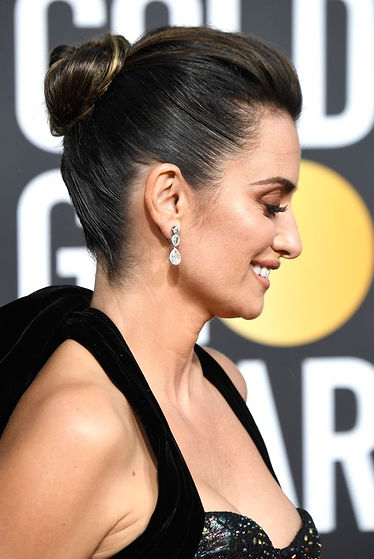

Here is my sculpting:
.png)
.png)
Check out how I made it:
Eye
Anatomy of the eye

First technique:
During week 5, we practised on the sculpting of the eye. Basically, we learn two different approaches to sculpt an eye: Maya techniques of polygons have inspired the first approach. I chopped off the bottom and top of two spheres to capture the upper lid and lower lid, as capturing eyelids is the trickiest part of our sculpting. Then I used MergeDown button to merge down the tools.
Sculpting an eye from reference
Albert Einstein
These are my reference picutres:


My sculpting using the first technique:
.png)
.png)
A screen recording to see my workflow:
Second technique
The second method is a more traditional way of sculpting the eye. I used DemoAnimeHead and worked on it. I also appended two (with Duplication) spheres as eyeballs and used Deformation -> Mirror to place the second eyeball correctly in its position.
Sculpting using the second approach
.png)
.png)
Workflow:
See my model on Sketchfab
To get my model ready for 3D printing on Sketchfab, I have done some important works:
-
I merged down all the subtools
-
I used Decimation Master which is a useful and efficient plugin to significantly reduce the polygons to be used with 3D model viewers such as Sketchfab
-
In Decimation Master, I used Process Current and Decimate Current
-
I exported the model by FBX ExportImport under Zplugin menu
-
I uploaded my model (.fbx file) on Sketchfab
Another eye using the first technique:
Robert De Niro
As another reference, I picked Robert De Niro and sculpted his eyes:


Tried to capture the form of his eyes, below is my sculpting:
.png)
.png)
A part of my workflow:
Lecture 7: Sculpting a basic head (skull)
In lecture 7, we got a feel for how to sculpt a head using two techniques: 1) Starting from a sphere, 2) starting from a template (male head plane).
First technique: Starting from a sphere
To my eyes, the first technique is more tricky than the second one. However, it is worth trying this technique, as it significantly helps to gain a good understanding of the proportions and anatomy of the skull.
I started with the below workspace:
.png)
As you see, I used two reference images from a male skull, a profile and front view one. Then, I tried to make the sphere like a human skull. I did that with Move brush.
.png)

My sculpting using the first technique
.png)
.png)
Check out how I sculpted it:
Second technique: Starting from a template
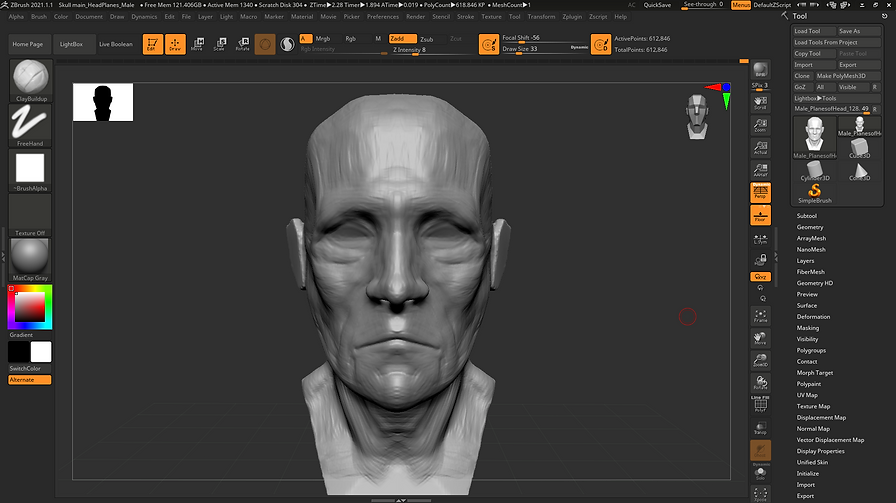
For the second approach, I used HeadPlanes_Male template and tried to sculpt a human head from the reference images.
My sculpting of a human head using the second technique
Below is my sculpture:
.png)
.png)
A screen recording of it:
Villain: developing an idea
For my villain task, I am going to model a Dracula character. Dracula is a renowned villain coming from many different stories, books, movies, etc. The most well-known one comes from Bram Stoker's novel (1897), who was an Irish author. Dracula is also widely recognised as the archetype of the vampire.
About Dracula in Encyclopaedia Britannica:
"A popular theory among critics is that the character Count Dracula is based on the infamously barbaric Vlad III, better known as Vlad the Impaler. Vlad was born in Transylvania in the 15th century and was known popularly as Drăculea, meaning “Son of Dracul” (his father was surnamed Dracul after being appointed to a knightly order called the Order of the Dragon). This name was derived from the Latin draco, meaning “dragon,” the basis for the elder Vlad’s epithet. In modern Romanian, drac has evolved to mean “devil.” Stoker is thought to have picked the name Dracula after reading a book that revealed to him this modern translation. His notes include the annotation “in Wallachian language means DEVIL,” written in response to drac. The name, however, is not all Dracula and Vlad III have in common. Vlad impaled his enemies on stakes to consolidate his political power in Walachia. One account also claimed that while his victims were dying atop the stakes, Vlad would dip bread in their blood and eat it in front of them, but that account is unconfirmed. Whether Vlad truly consumed blood, the parallels with Stoker’s Dracula remain evident. Some critics, however, have argued that Stoker’s inspiration came primarily from other sources and that Vlad simply provided the name."
How did Dracula become the world's most famous vampire?
Count Dracula on Villains Wiki
For detailed information about the villain, check out this link: Dracula on Villains Wiki
Moodboard
I put together a mood board with a few key images best conveying Dracula villain character.


Lecture 8: Fat, PolyPaint and Spotlight
Task: Skull Fat Pads
I have indicated every fat pads of the human face below:

Texturing in Zbrush: PolyPainting and Spotlight
For texturing, there are two major techniques in Zbrush: 1- Polypainting 2- Spotlight. Polypainting allows painting on the model's surface. Spotlight is a painting system that enables us to project an image to the surface of the model using the intuitive sculpting and painting brushes.
Assigning base colour and material
Always use Fill Object before painting. It allows laying down a base colour for the tools. To do this, make sure the RGB or MRGB (for both materials and colour) button is on in the Draw palette. Select a suitable base colour and material to work with. Go to Color > Fill Object.
Note: Turn off Zadd when painting on objects.
Note:
To paint colours: Spray + Alpha 07
To paint veins: DragRect + Alpha 60
To paint spots: DragRect + Alpha 01
Note: Press C on the keyboard to grab the colour from where the mouse hovers over.
My Dracula - Villain task
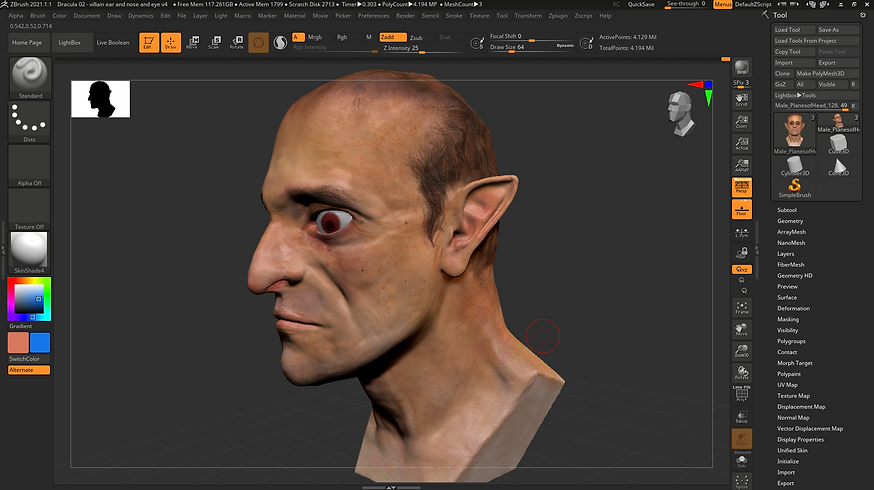
Practising the techniques of sculpting, texturing and painting, I made my first attempt to model my Dracula:
.png)
.png)
.png)
Turntable movie:
My model on Sketchfab
Developing my villain further: adding more details


Lecture 9: Neck, Hair, Clothing and IMM brushes
In lecture 9, we looked at the anatomy of the neck. Also, we learnt different ways of modelling the hairs. Finally, we got a feel for how to sculpt clothing and use IMM brushes in Zbrush.
Hairs
Different ways of making hairs:
-
Sculpting hairs using Clay Buildup brush. Use different sizes of the brush to add details to the hairs. Also, after sculpting the base, use Dam Standard (with and without pressing Alt) to give more definition and make a parting maybe! Note: this technique is handy for 3D printing because, in contrast to the second and third techniques, it can be 3D-printed.
-
Using FibreMesh. To tidy up the hairs after FibreMesh, use groom brushes (B - G).
-
Making hairs in Maya.
Clothing
To sculpt clothing: use the Extract function. Under Subtool -> Extract.
To tidy up edges: use Polish Crisp Edges under Deformation.
To import a logo for clothing: DragRect -> Alpha -> Import.
IMM Brushes
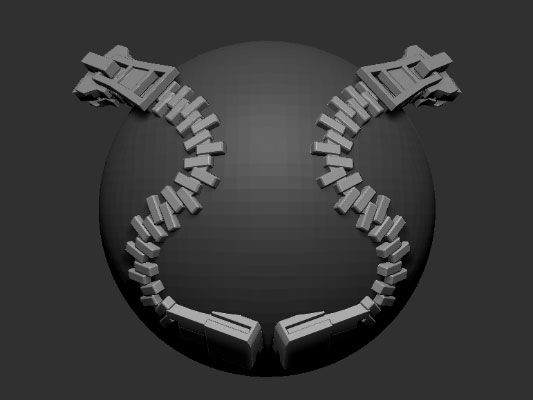
IMM brushes: IMM Parts is one of them. What the brush does is similar to appending objects. We can choose what object we want to add with IMM parts. To make a zipper, we use IMM ZipperM brush.

Lecture 10: Taking a model from Zbrush into Maya
In lecture 10, we learnt a very useful workflow of taking out a model from Zbrush and bringing it into Maya.
This is the model in Zbrush:
.png)
I quickly brought it into Maya during the class, as below:
.png)
Workflow: Bringing my villain into Maya
This workflow can be used for every model I want to bring into Maya:
-
Duplicating and renaming the model. Before duplication, in this case, I merged down all the subtools to have only 1 subtool for duplication. I renamed the duplicated model and named it "Low_Poly".
.png)
-
Using Zremesher to create a low poly version of the model. Then I subdivided the low poly model four times.
.png)
-
Projecting the mesh information onto the low poly model. By doing this, the low poly model becomes very similar to the high poly one, although the low poly model has much fewer polygons than the high poly one.
.png)
-
Generating UV mapping in ZBrush. To do that, I changed the model to the lowest subdivision version (1 SDiv) under Geometry. Then I went to Zplugin -> UV Master -> Unwrap.
-
Exporting the low poly model in obj format at this step. It will make two files: 3D obj file and MTL file. I put the files into the folder "data" in my Maya project folders.
-
Exporting the displacement and texture (from polypaint) maps. To do that, first I change SDiv to maximum, then I went to Zplugin -> MultiMap Exporter. I turned on Texture From Polypaint and Displacement. I also turned on Flip V, then went under Export Options -> Displacement Map and activated 32 Bit and "exr" buttons and changed Mid number to 0 (to be suitable to Maya). I set the Map Size to be 2048. After pressing Create All Maps, it generated two files: a displacement map and a texture map. I put these files into the folder of "data" inside my Maya project folder.
.png)
-
Loading into Maya, generating HDR lighting set up and applying lighting maps and subdivision to the model. To do it, I imported the obj file into Maya. Then, I made a Skydome light in the scene. I put TM file into Subsurface Clour and DM file into Displacement Mat under Shading Group Attributes. Finally, it is very important to change the subdivision settings of Arnold renderer: Type: catclark, iterations: 4. I also changed the Sampling settings of Arnold to reduce the noise when rendering my model.
.png)
.png)
My rendered model

Fixing a problem
As you can see above, the model is very waxy and shiny. The Subsurface Scattering shading map causes this as it tries to mimic light bouncing underneath the surface. To fix this problem, I simply scaled up the model. Bellow is the result:
.png)

Development of my villain
I made my villain look older, more wrinkly and haggard.


Development of my villain - Fourth development
For the evolutionary reason, we, as humans, are very likely to pay close attention to the edges of things and pick up on any incorrectness. Thus, I tried to smooth a part of the head that edges are visible and sculpt some hairs. I also worked on other parts of the model, such as eyes, ears and lips, to make it more vampirish!


Lecture 12: Facial Action Coding System (FACS)
This week, I got a feel for what the Facial Action Coding System (FACS) are. FACS refers to different facial muscle movements called Action Units (AUs) that display various emotions.
Task: Display happiness and sadness
Happiness:
To display joy/happiness, I combined these action units: 6 + 12 + 25

Sadness:
To convey sadness, I combined these action units: 1 + 4 + 15

Assignment 2
For assignment two, I developed my model and added some expressions to it. I tried to capture happiness, sadness, anger and contempt by using different Action Units, according to FACS.
Happiness

Sadness

Anger

Contempt
